Table of Contents
Project Creation
Project Definition
The Thinknx project created inside the Configurator is defined as a folder containing all the configuration files and settings related to the user interface and system logic for a specific plant. All files imported in the project (such as ETS, images, etc.) are copied and stored in the project folder.
A Thinknx project exported using the Classic Configurator (version 1.2.25) has the extension .erg, while a projet exported using the new UP Configurator (version 1.3.0.8) has the extension .tup.
Project Creation
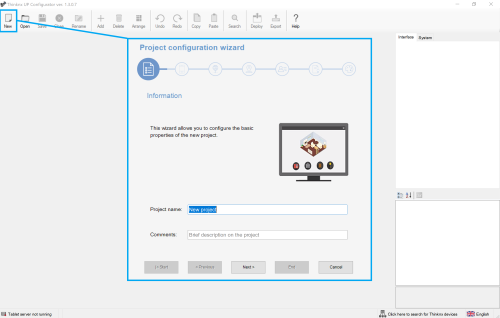
Projects can be created using a dedicated wizard tool, which will be automatically launched by clicking on the ”New” button in the toolbar above.
- Step 1 Enter the project name without spaces or diacritic signs (mandatory).
Figure 1: New project button and wizard first step
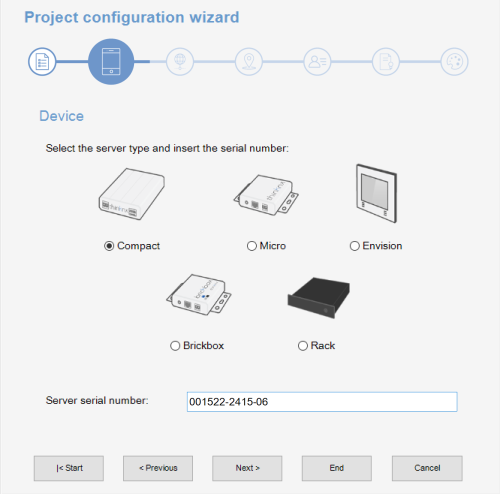
- Step 2 Select the server type (mandatory) and enter the device serial number (optional); go to the next phase by clicking on ”Next” or conclude the wizard by clicking on ”End”; all the following steps are optional .
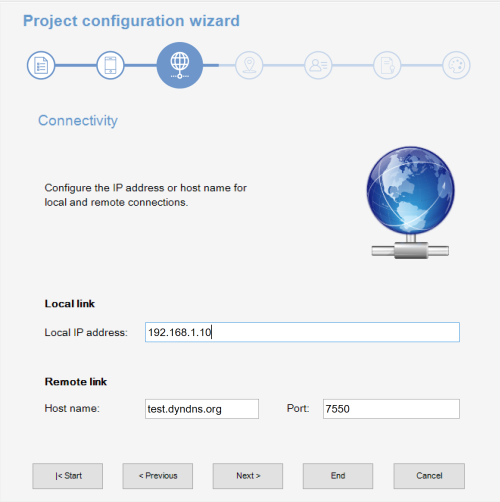
- Step 3 Enter IP address to connect to the server using the local network or host name and port (if different from the predefined one) to use remote connection.
Figure 3: connection settings
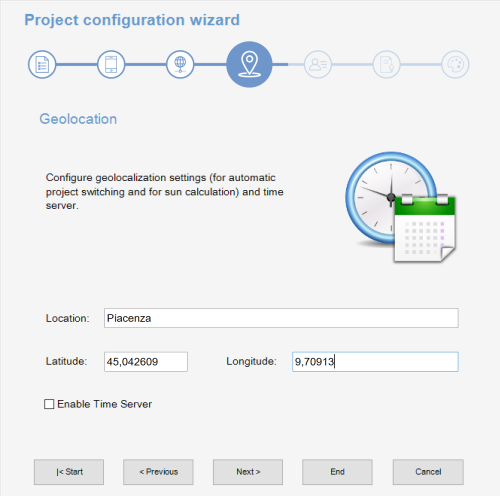
- Step 4 The name and even the geographic coordinates of the location where the server is installed should be typed in this section. These data will be used on clients when the geolocalization feature is active. These settings are mandatory if the sun calculator object is added to system. Check the box ”Enable Time Server” to use the server as time and date source for KNX devices. Server will synchronize with NTP time server if an internet connection is available.
Figure 4: server location settings
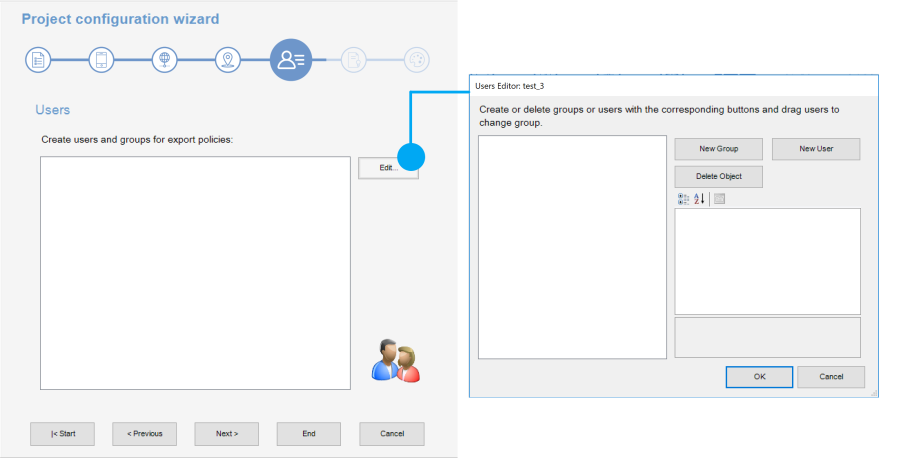
- Step 5 If the plant will be managed by different users and different user interfaces for each user has to be created than it is necessary to create users and groups to be used for export policies. It is possible by clicking on the ”Edit” button to access the users editor window. For more details about users creation refer to this section.
Figure 5: users creation for restrictions
Once all users and groups are set, a summary is displayed in the empty window. Click on “Next” to move to the next step.
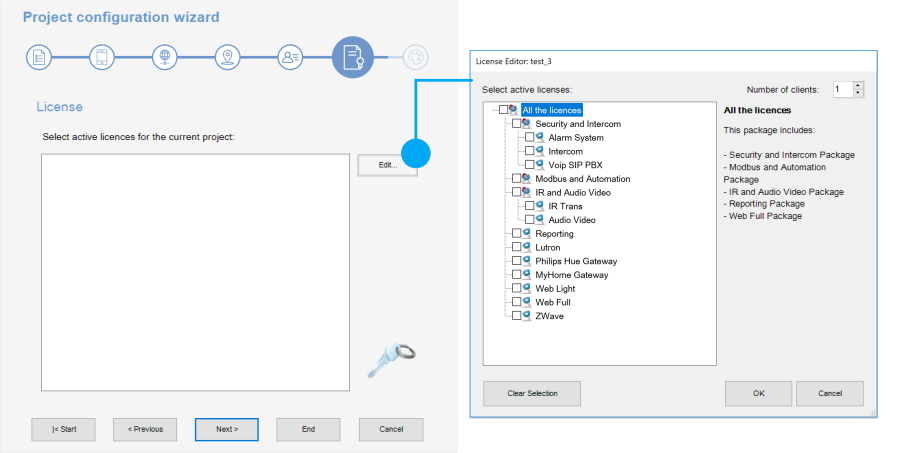
- Step 6 Selecting the active licences for the project permits that configurator checks while exporting whether objects and functions configured into the project will properly work once the project will be exported and uploaded on the server. In fact, if the project contains objects that are not included in licences purchased by the customer, they will not be working in the real installation.
Figure 6: project active licenses editor
Click on “Edit” button to access the licences editor. Single licences, and packages can be selected in the licences editor window. For more details refer to this section.
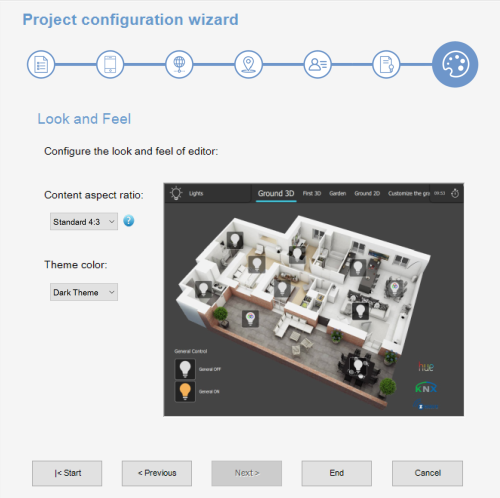
- Step 7 Configure the Look and Feel of the editor. Before starting the project, it is possible to select the preferred aspect ratio. The available options are:
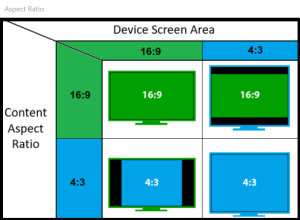
- Standard 4:3 (1024×768 px) if this aspect ratio is selected and the device used to view the project is widescreen, additional spaces will be added to the left and right of the project to fit the screen. To hide that, the background image can be enlarged outside the limit of the project in a way to cover the gray space added.
- Wide 16:9 (1024×576 px) if this aspect ratio is selected and the device used to view the project is standard 4:3, additional spaces will be added on the top and bottom of the project to the fit the screen. To hide that, the background image can be enlarged outside the limit of the project in a way to cover the gray space added.
- Envision (1024×600 px - background picture size 1024×540 for 7inch and 1280×740 for 10inch) this option is used when the Envision alone is used to view the project or has a priority over the other devices.
- Balanced (1024×672 px) this option is recommended when multiple devices with different resolutions are used.
Figure 7: aspect ratio
It is also possible to select the between a Dark or White theme for the project.
Figure 8: look and feel of the project
- Step 8 Click on End to close the wizard and access the new project.
The same data requested by the Wizard can be set or modified at a later stage, by clicking on System tab inside the Configurator and selecting system from the tree. The properties will be displayed in the property grid below the tree.
