Table of Contents
VoIP PBX & Doorcom

Every Thinknx server includes a VoIP PBX to manage calls between clients and SIP door stations. The system supports both local accounts, registered on the installation's network, and Mobile App accounts, which allow intercom calls to be received from outside the local network through Thinknx Cloud PBX.
This page describes the configuration of the PBX system object, account management, call window options, and integration examples for SIP door stations.
Operation and requirements
When a door station makes a call, the PBX forwards it to the configured user or ring group. A ring group allows several clients to ring using a single extension number.
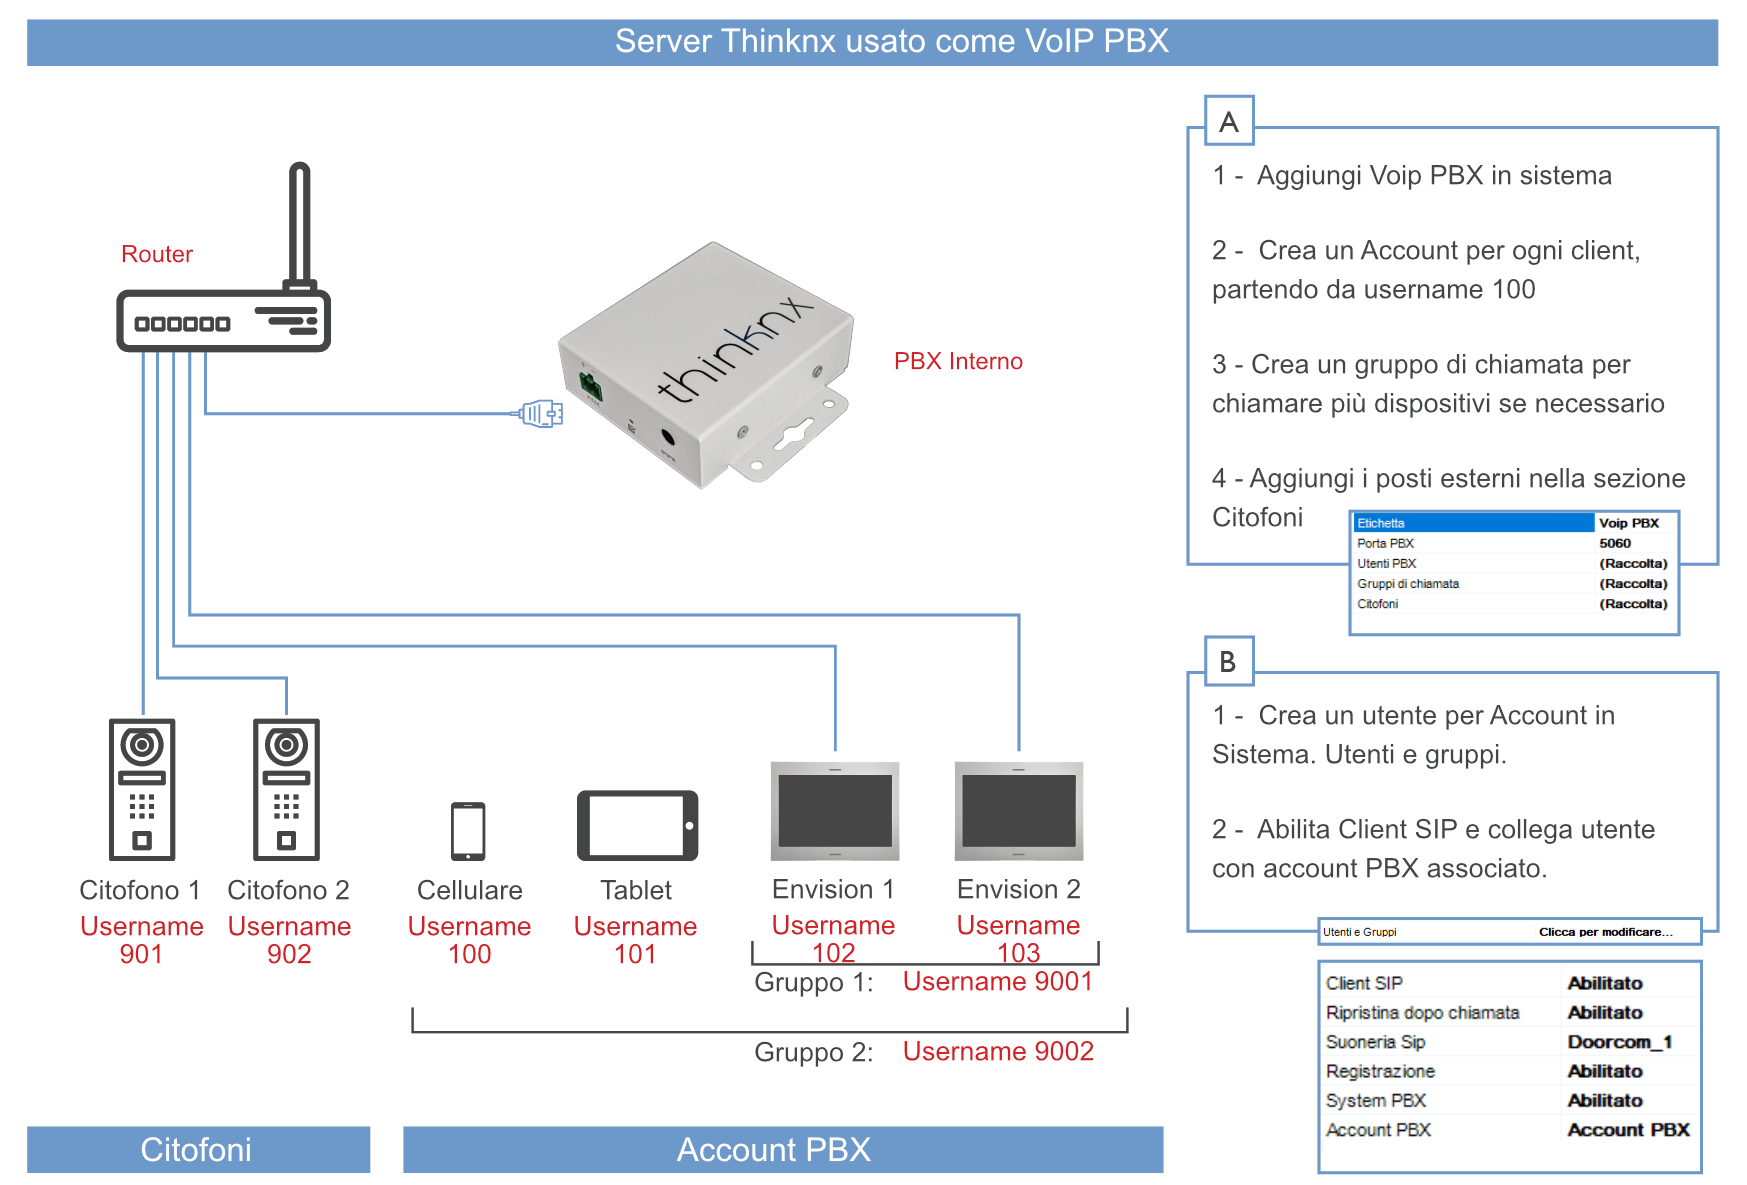
Thinknx server used as a VoIP PBX
For local communication, the server, clients and door station must be able to reach one another on the installation's network. Separate networks can be used provided that routing and firewall settings allow the devices to communicate.
Remote intercom calls also require a correctly configured Mobile App account and connectivity to the services used by Thinknx Cloud PBX.
Requirement for remote calls: the door station must be connected to the Internet. An Internet connection on the Thinknx server alone is not sufficient.
Software versions required for remote calls:
- Server: 1.1.10.34
- Client: 1.2.46
- Configurator: 1.4.9
When an external VoIP PBX is used, the VoIP PBX object does not need to be added to the System tab. Extensions are configured on the external PBX. For each Thinknx client, create a user in System → Users and Groups, disable PBX system and enter the registration details for the external PBX.
Configuring the PBX in the Configurator
Add the VoIP PBX object in the System tab of Thinknx Configurator. The main properties are:
- PBX Port: SIP port used by the local PBX. The default is 5060.
- PBX Accounts: list of accounts associated with local clients or Mobile App users.
- Ring Groups: list of groups that can be reached using a single extension number.
- Intercom Devices: list of SIP door stations and their settings.
PBX Accounts
Open the PBX Accounts property editor and add the required accounts. The User Type property distinguishes local accounts from mobile app accounts.
| Account type | Supported devices | Connection |
|---|---|---|
| LAN Devices | Envision, K2, Piccolo, Trend Line devices and Windows clients | Registration with the PBX over the local network. The same account can be assigned to multiple users. |
| Mobile App | iOS and Android smartphones and tablets running the Thinknx app | Registration through Cloud PBX, including from outside the local network. Each account must be assigned to a single Thinknx user. |
LAN Devices
The following properties are available for local accounts:
- Extension: extension number used by the client to register with the PBX. Numbering starts at 100.
- Password: SIP password associated with the extension.
LAN Devices accounts retain the behavior of existing projects and are not subject to the limit applied to remote accounts.
Mobile App
When User Type: Mobile App is selected, the Configurator automatically generates the SIP credentials. The credentials are associated with the Thinknx user, are not displayed and do not need to be entered manually in the app.
Instead of Extension and Password, the following properties are available:
- Credentials Generated: displays the date on which the credentials were generated.
- Regenerate Credentials: generates new random credentials for the account.
Create a Mobile App account for each remote user and assign it to the corresponding user in Users and Groups. Mobile App accounts are not supported on Envision, K2, Piccolo or Windows clients; these devices must use LAN Devices accounts.
Assigning an account to a Thinknx user
To assign a Mobile App account to a Thinknx user:
- Open System → VoIP PBX → PBX Accounts and create an account of type Mobile App.
- Open System → Users and Groups and select the user to configure.
- Enable SIP Client, Register and PBX system.
- Under PBX Account, select the Mobile App account previously created.
- Export the project and distribute it to the user.
The Thinknx app automatically uses the credentials associated with the account, without asking the user to enter them manually.
Managing duplicate accounts
Each Mobile App account can be assigned to only one Thinknx user.
If a Mobile App account is assigned to another user, the Configurator offers to create a new account as a copy of the existing one.
When users or groups associated with Mobile App accounts are duplicated, the Configurator also offers to create new accounts. If No is selected, the duplicated users will not have a PBX account assigned.
If a project contains accounts shared by multiple users, the PBX Accounts editor allows separate Mobile App accounts to be created, or the shared accounts to be kept as LAN Devices accounts.
During export, any Mobile App account assigned to multiple users is reported as an error and must be corrected.
Ring Groups
Open the Ring Groups property editor, add a group and configure:
- Ring Group Number: extension number associated with the group, assigned by the Configurator.
- PBX Accounts: accounts to include in the group.
- Commands to Execute: commands triggered when the group receives a call.
When a door station calls a ring group's number, the call is forwarded to the associated accounts.
Intercom Devices
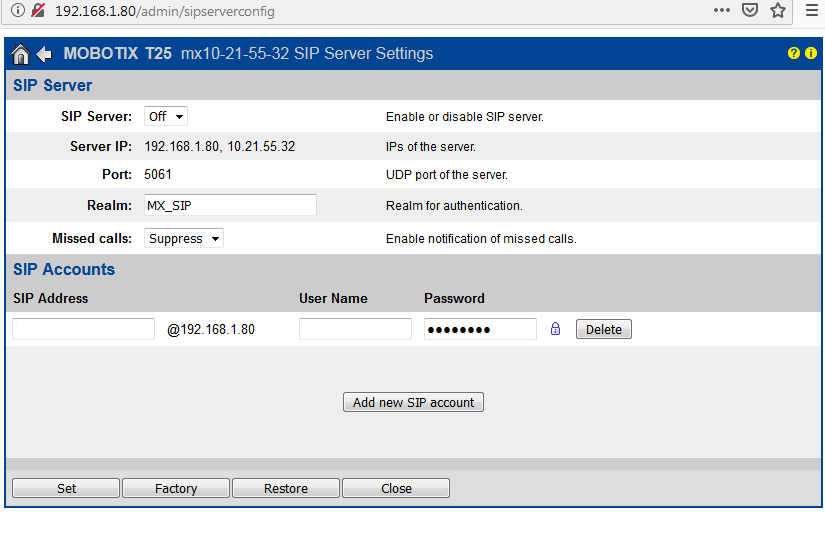
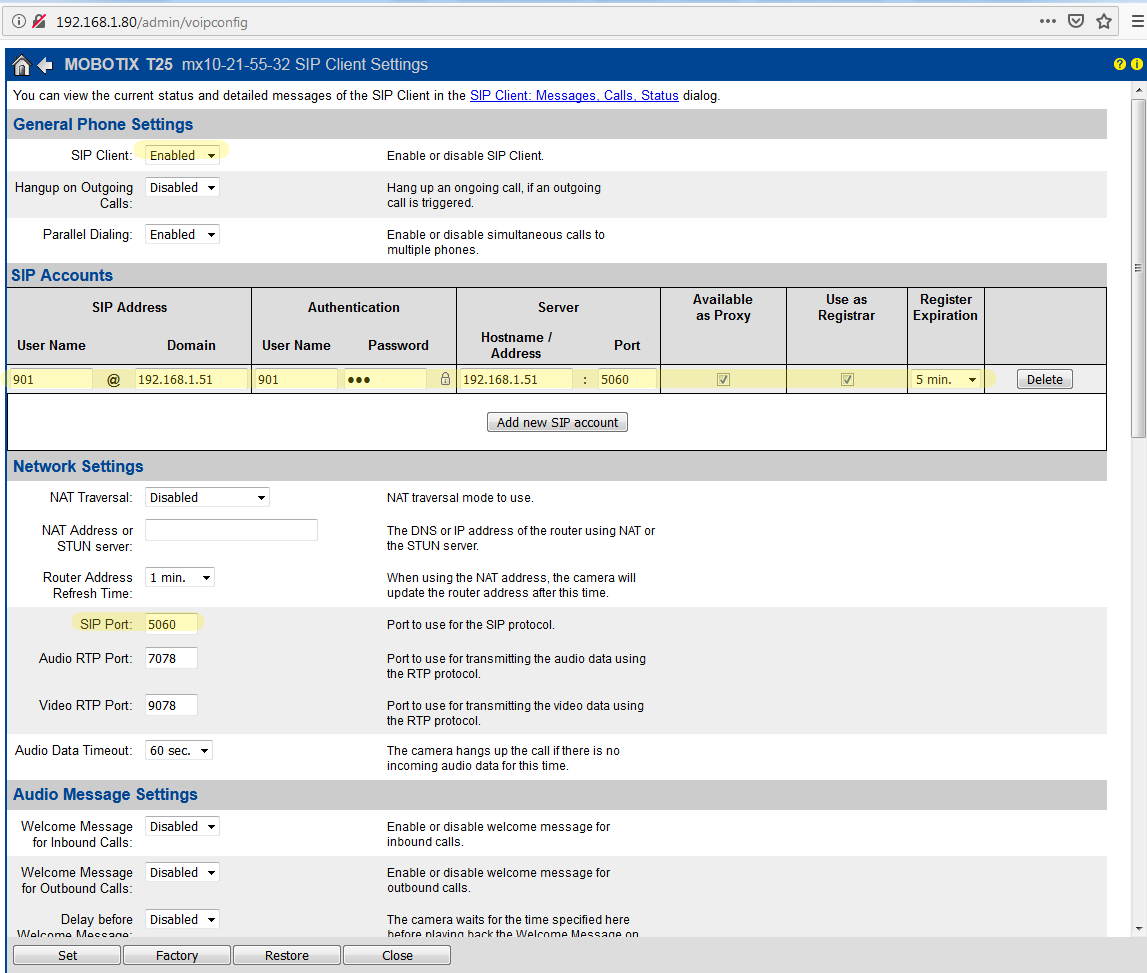
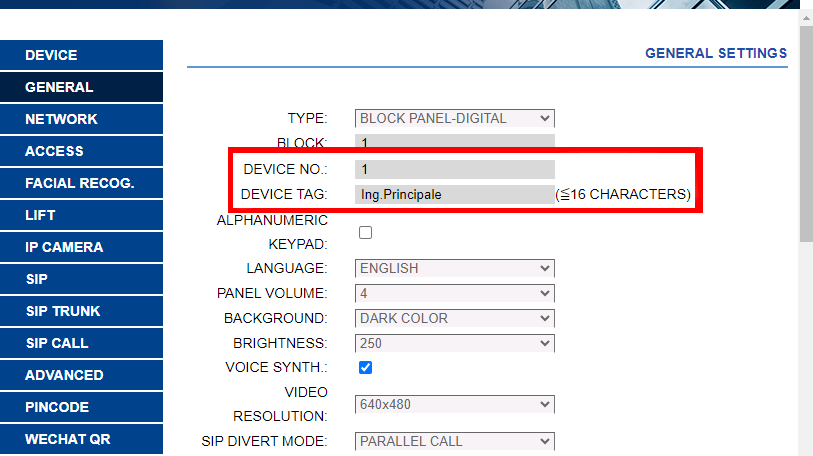
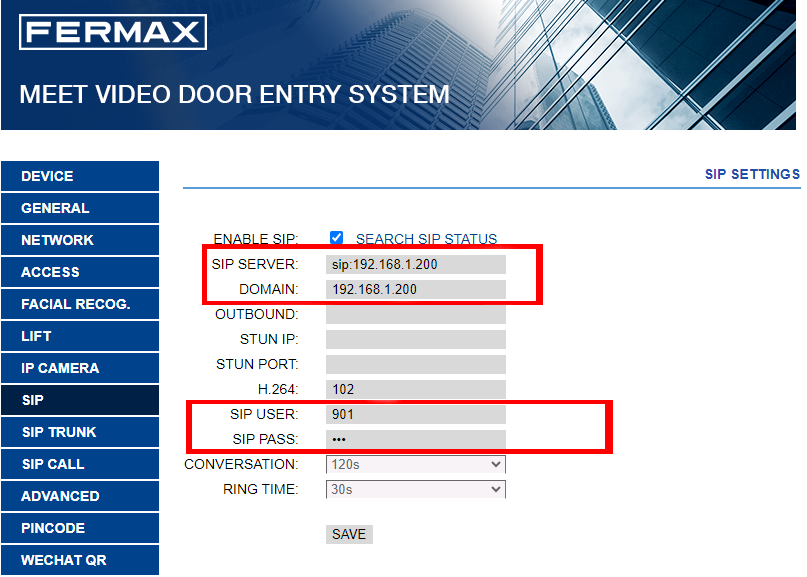
Open the Intercom Devices property editor and add the door station. By selecting Generic IP Doorstation, it is possible to configure SIP-compatible door stations such as 2N, DoorBird, Fermax, Mobotix, TCS and IPdoor.
The following properties are available for each intercom device:
- Device Type: model or type of door station.
- Username Web: username used to access the device's web configuration interface.
- Password Web: password used to access the device's web configuration interface.
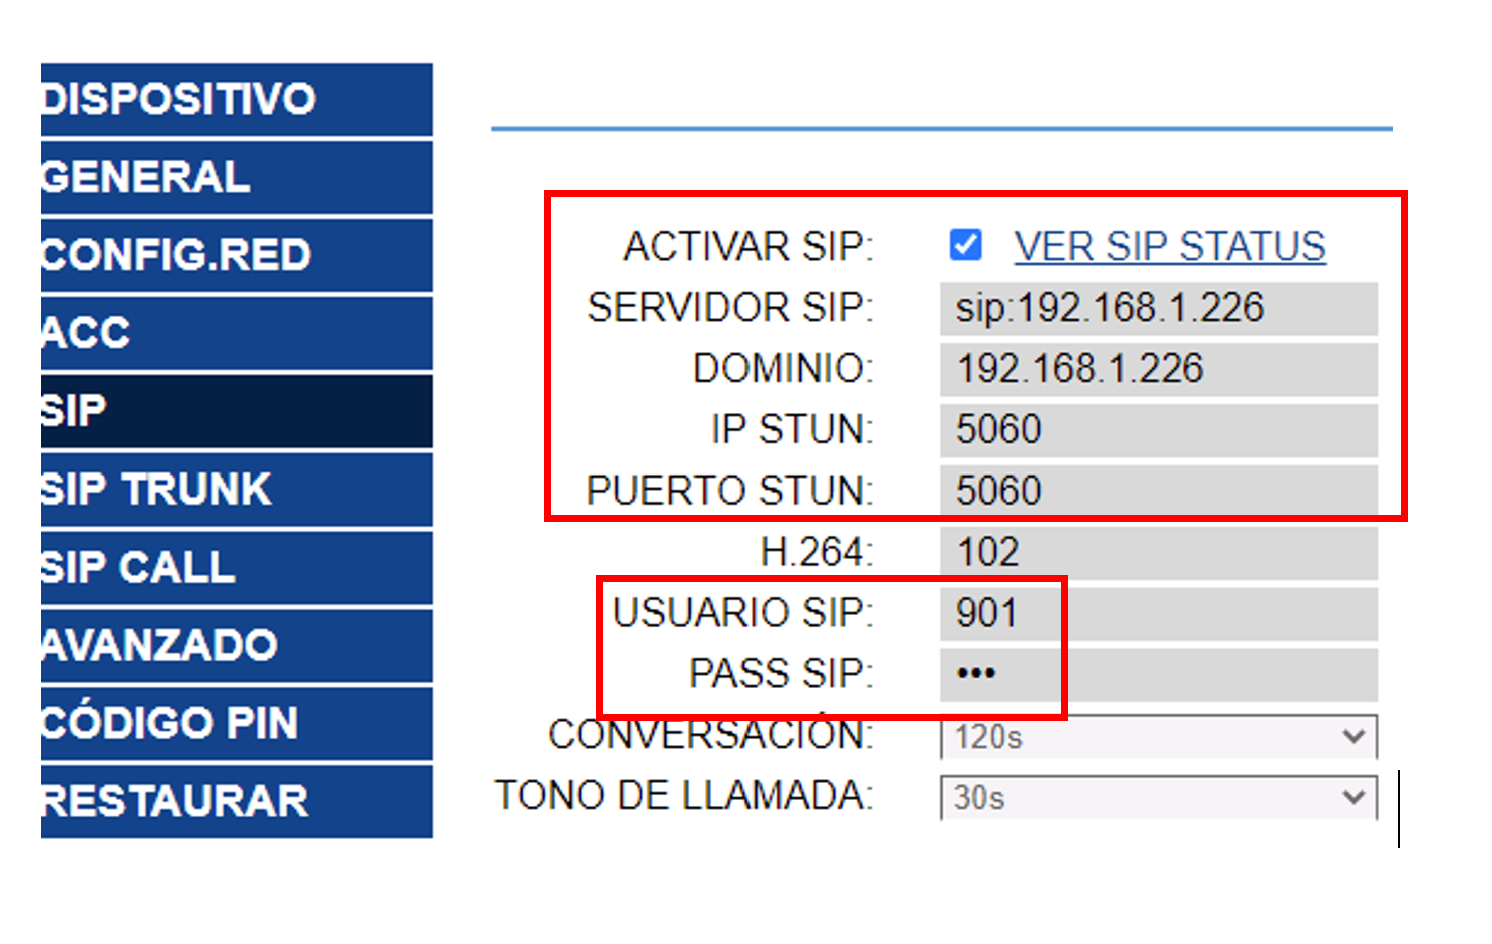
- Username PBX: extension used by the door station to register with the PBX. It is generated automatically and cannot be edited. Numbering starts at 901.
- IP Address: address of the door station.
- Port: communication port of the door station.
- Intercom Buttons: associates the physical buttons on the door station with users or ring groups.
- Command Buttons: configures the buttons displayed in the app during a call.
- Auxiliary Camera: associates a camera to be used when SIP video is not available.
Intercom Buttons
Open the Intercom Buttons property editor and add an entry for each physical button to configure.
- Label: name used to identify the button in the Configurator.
- Button Number: number of the physical button on the door station.
- Call Single User: if enabled, the call is forwarded to a single user; otherwise, it is sent to a ring group.
- Ring Group PBX: group to call when group calling is selected.
Configuring the call window
The Command Buttons and Auxiliary Camera properties allow the call interface displayed by the Thinknx app to be customized. Both functions are available for local users and Mobile App users.
Command Buttons
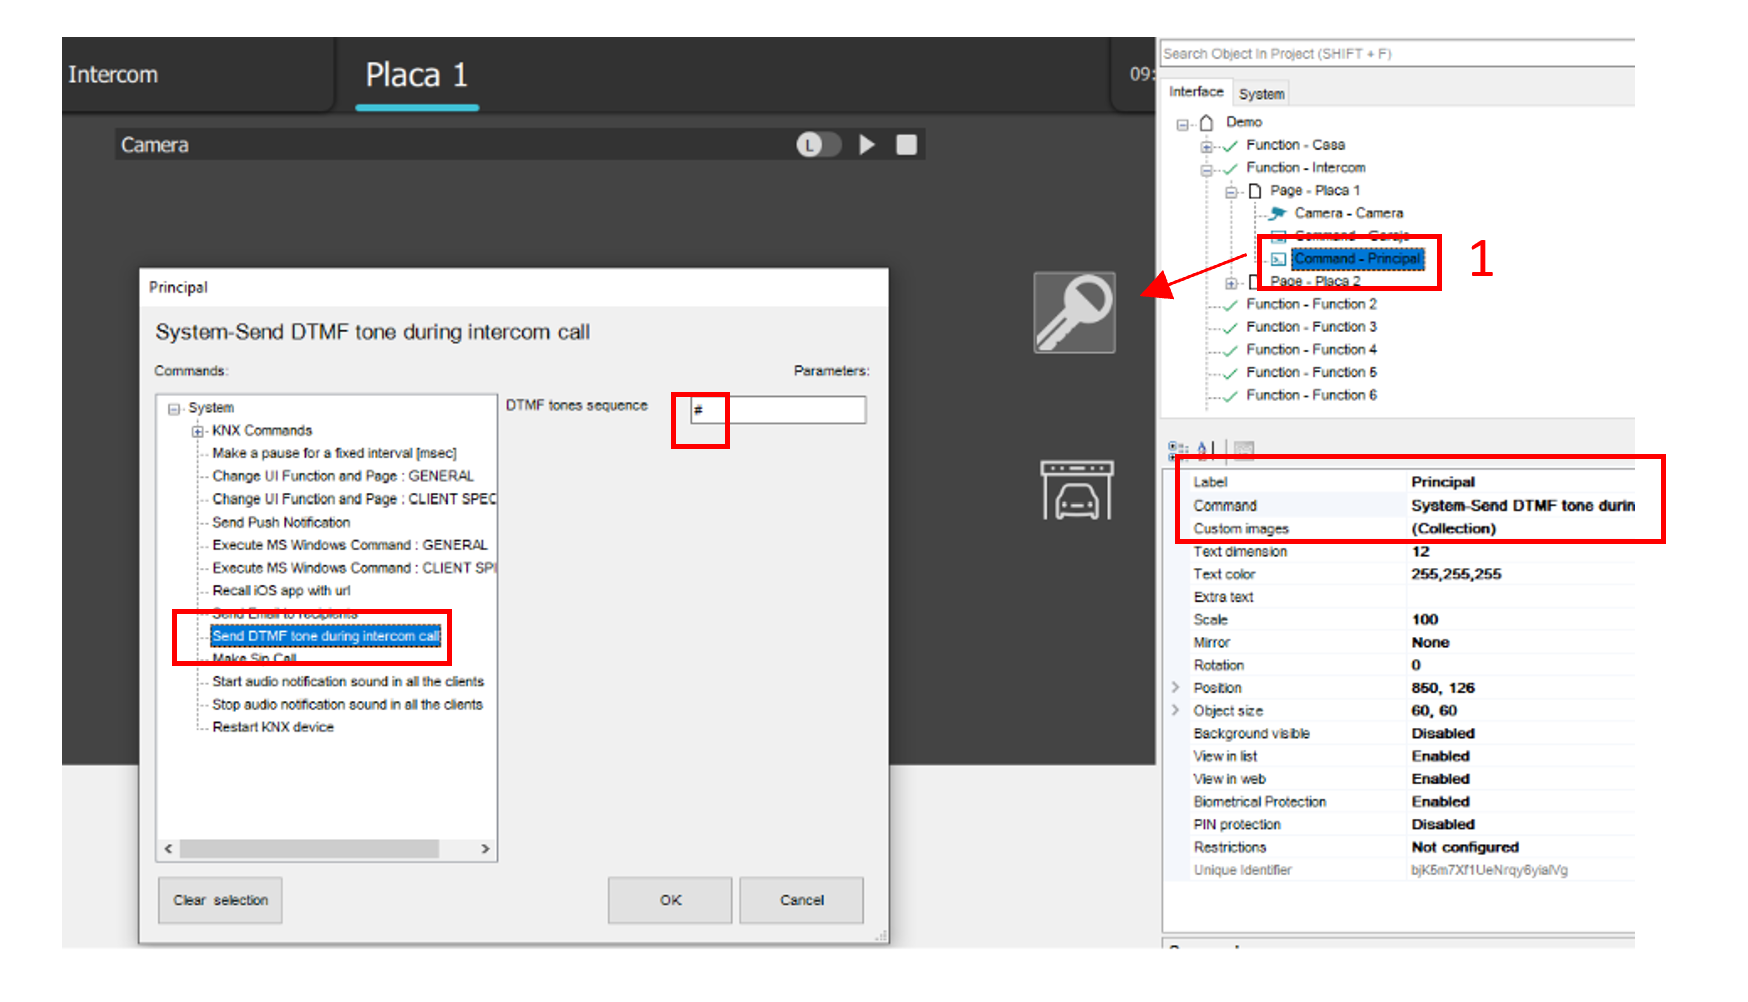
Select the intercom device and open the Command Buttons property editor. These buttons allow commands in the project to be executed during a conversation, for example opening the entrance door or switching on the stairwell lights.
| Property | Description |
|---|---|
| Label | Text displayed on the button. |
| Command | Command executed when the button is pressed, selected from the commands available in the project. |
| Image | Icon or image associated with the button. |
The buttons appear in the order defined in the editor. Commands are sent to the Thinknx server and can also be executed when the app is connected from outside the local network.
Command Buttons should not be confused with Intercom Buttons: Command Buttons are displayed in the call window, while Intercom Buttons define the behavior of the physical buttons on the door station.
Auxiliary Camera
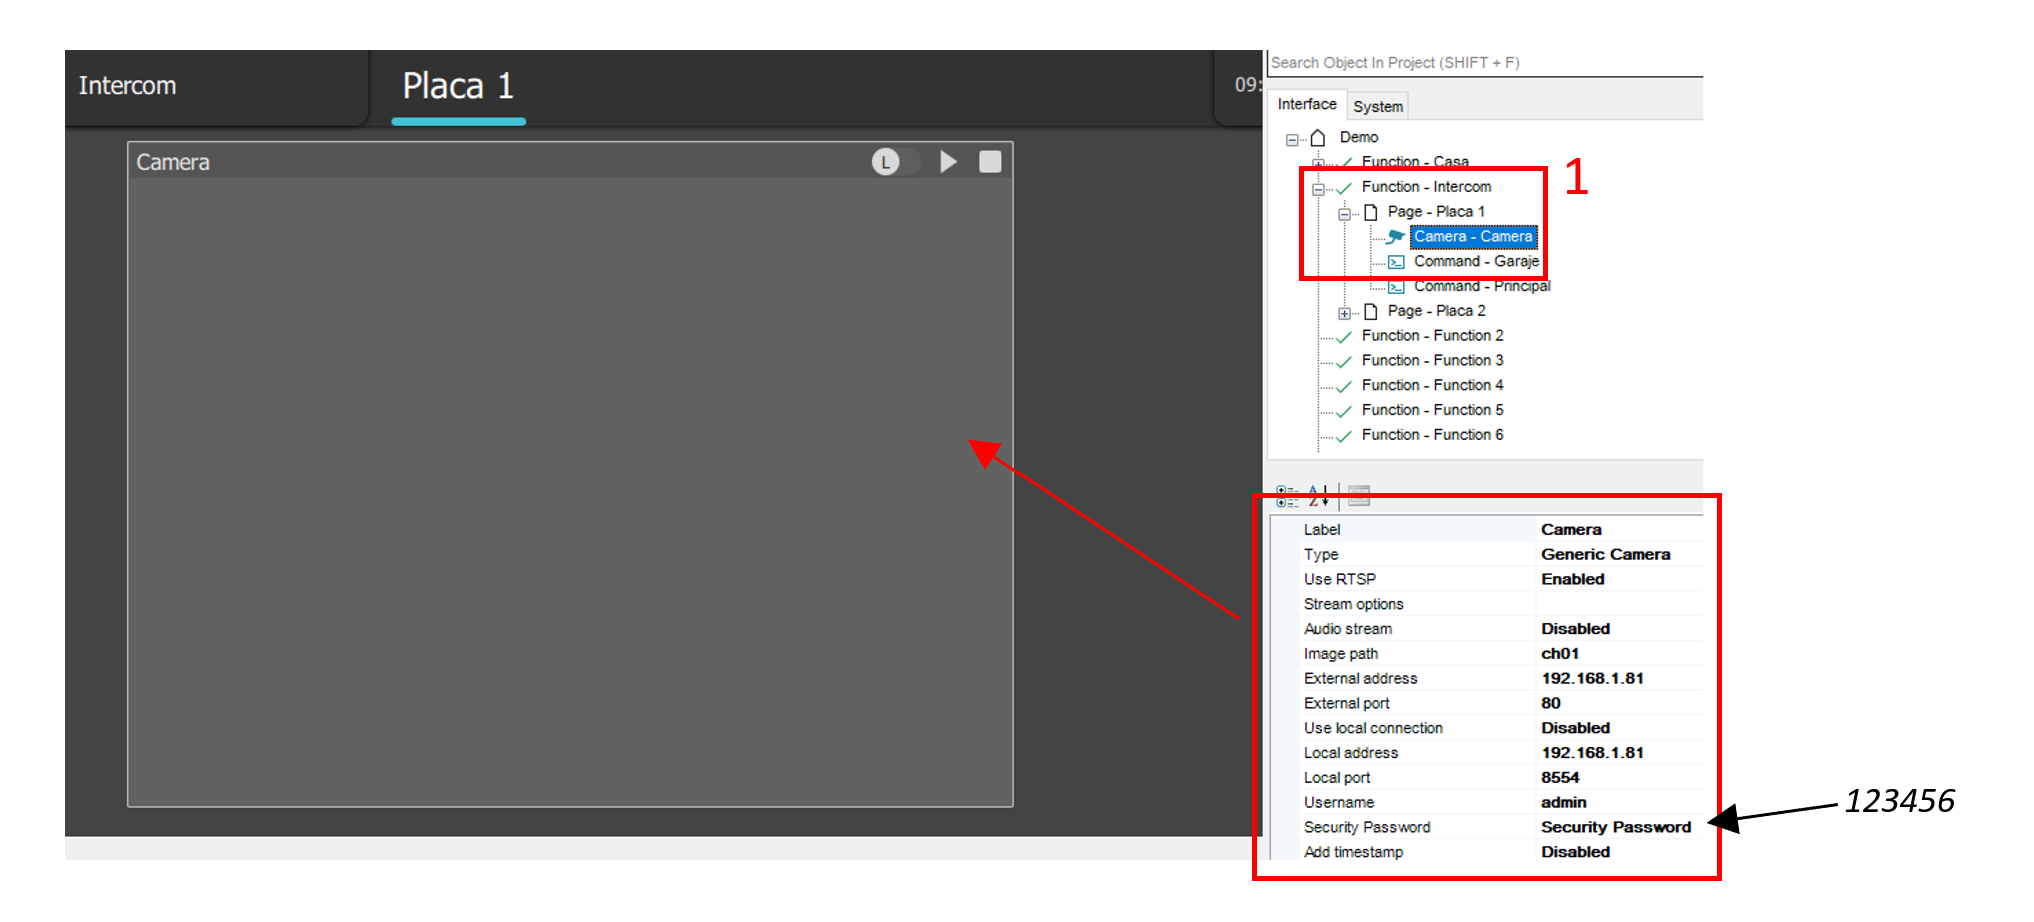
Enabling Auxiliary Camera allows an IP camera to be associated with the intercom device. Its image is displayed in the call window when SIP video from the door station is unavailable. If SIP video becomes available, it takes priority over the auxiliary camera.
The camera properties are:
| Property | Description |
|---|---|
| Camera Label | Name of the camera. If empty, the intercom device's label is used. |
| Camera Model | Camera model or protocol. |
| Use RTSP | Enables RTSP video streaming. |
| External Address and External Port | Hostname or address and port for access from outside the local network. |
| Local Address and Local Port | IP address and port on the local network. |
| Image Path | Path to the image or stream. |
| External URL and Local URL | Full URLs for the respective connection methods. |
| Camera Username and Camera Password | Credentials used to access the camera. |
| Add Timestamp | Adds the date and time to images. |
| Security Password | System security password; see Security Password. |
| VLC Options | Options passed to the VLC/RTSP player. |
Encrypted RTSPS is also supported for RTSP streams.
Call window in the app
When a call arrives, the app opens a window at the bottom of the screen. It adapts to portrait and landscape orientation and can be expanded to show the video and command buttons, or minimized to show only the essential call information.
Remote calls: accounts and limitations
Mobile App users can receive calls through Cloud PBX from outside the local network. Each account must be associated with one Thinknx user and can be active on only one device at a time.
The following limits apply to calls directed to remote users:
- Ringing time: 45 seconds. If nobody answers, the call ends.
- Maximum conversation duration: 90 seconds from the moment the call is answered. When this time expires, the call ends on both the mobile device and the door station.
These limits do not apply to calls made to local devices.
The VoIP SIP PBX license includes up to 4 Mobile App users. From 5 to 10 users, the Extended PBX license is also required. For more than 10 users, a dedicated request must be submitted to Thinknx. LAN Devices accounts are not subject to this limit.
SIP door station integration examples
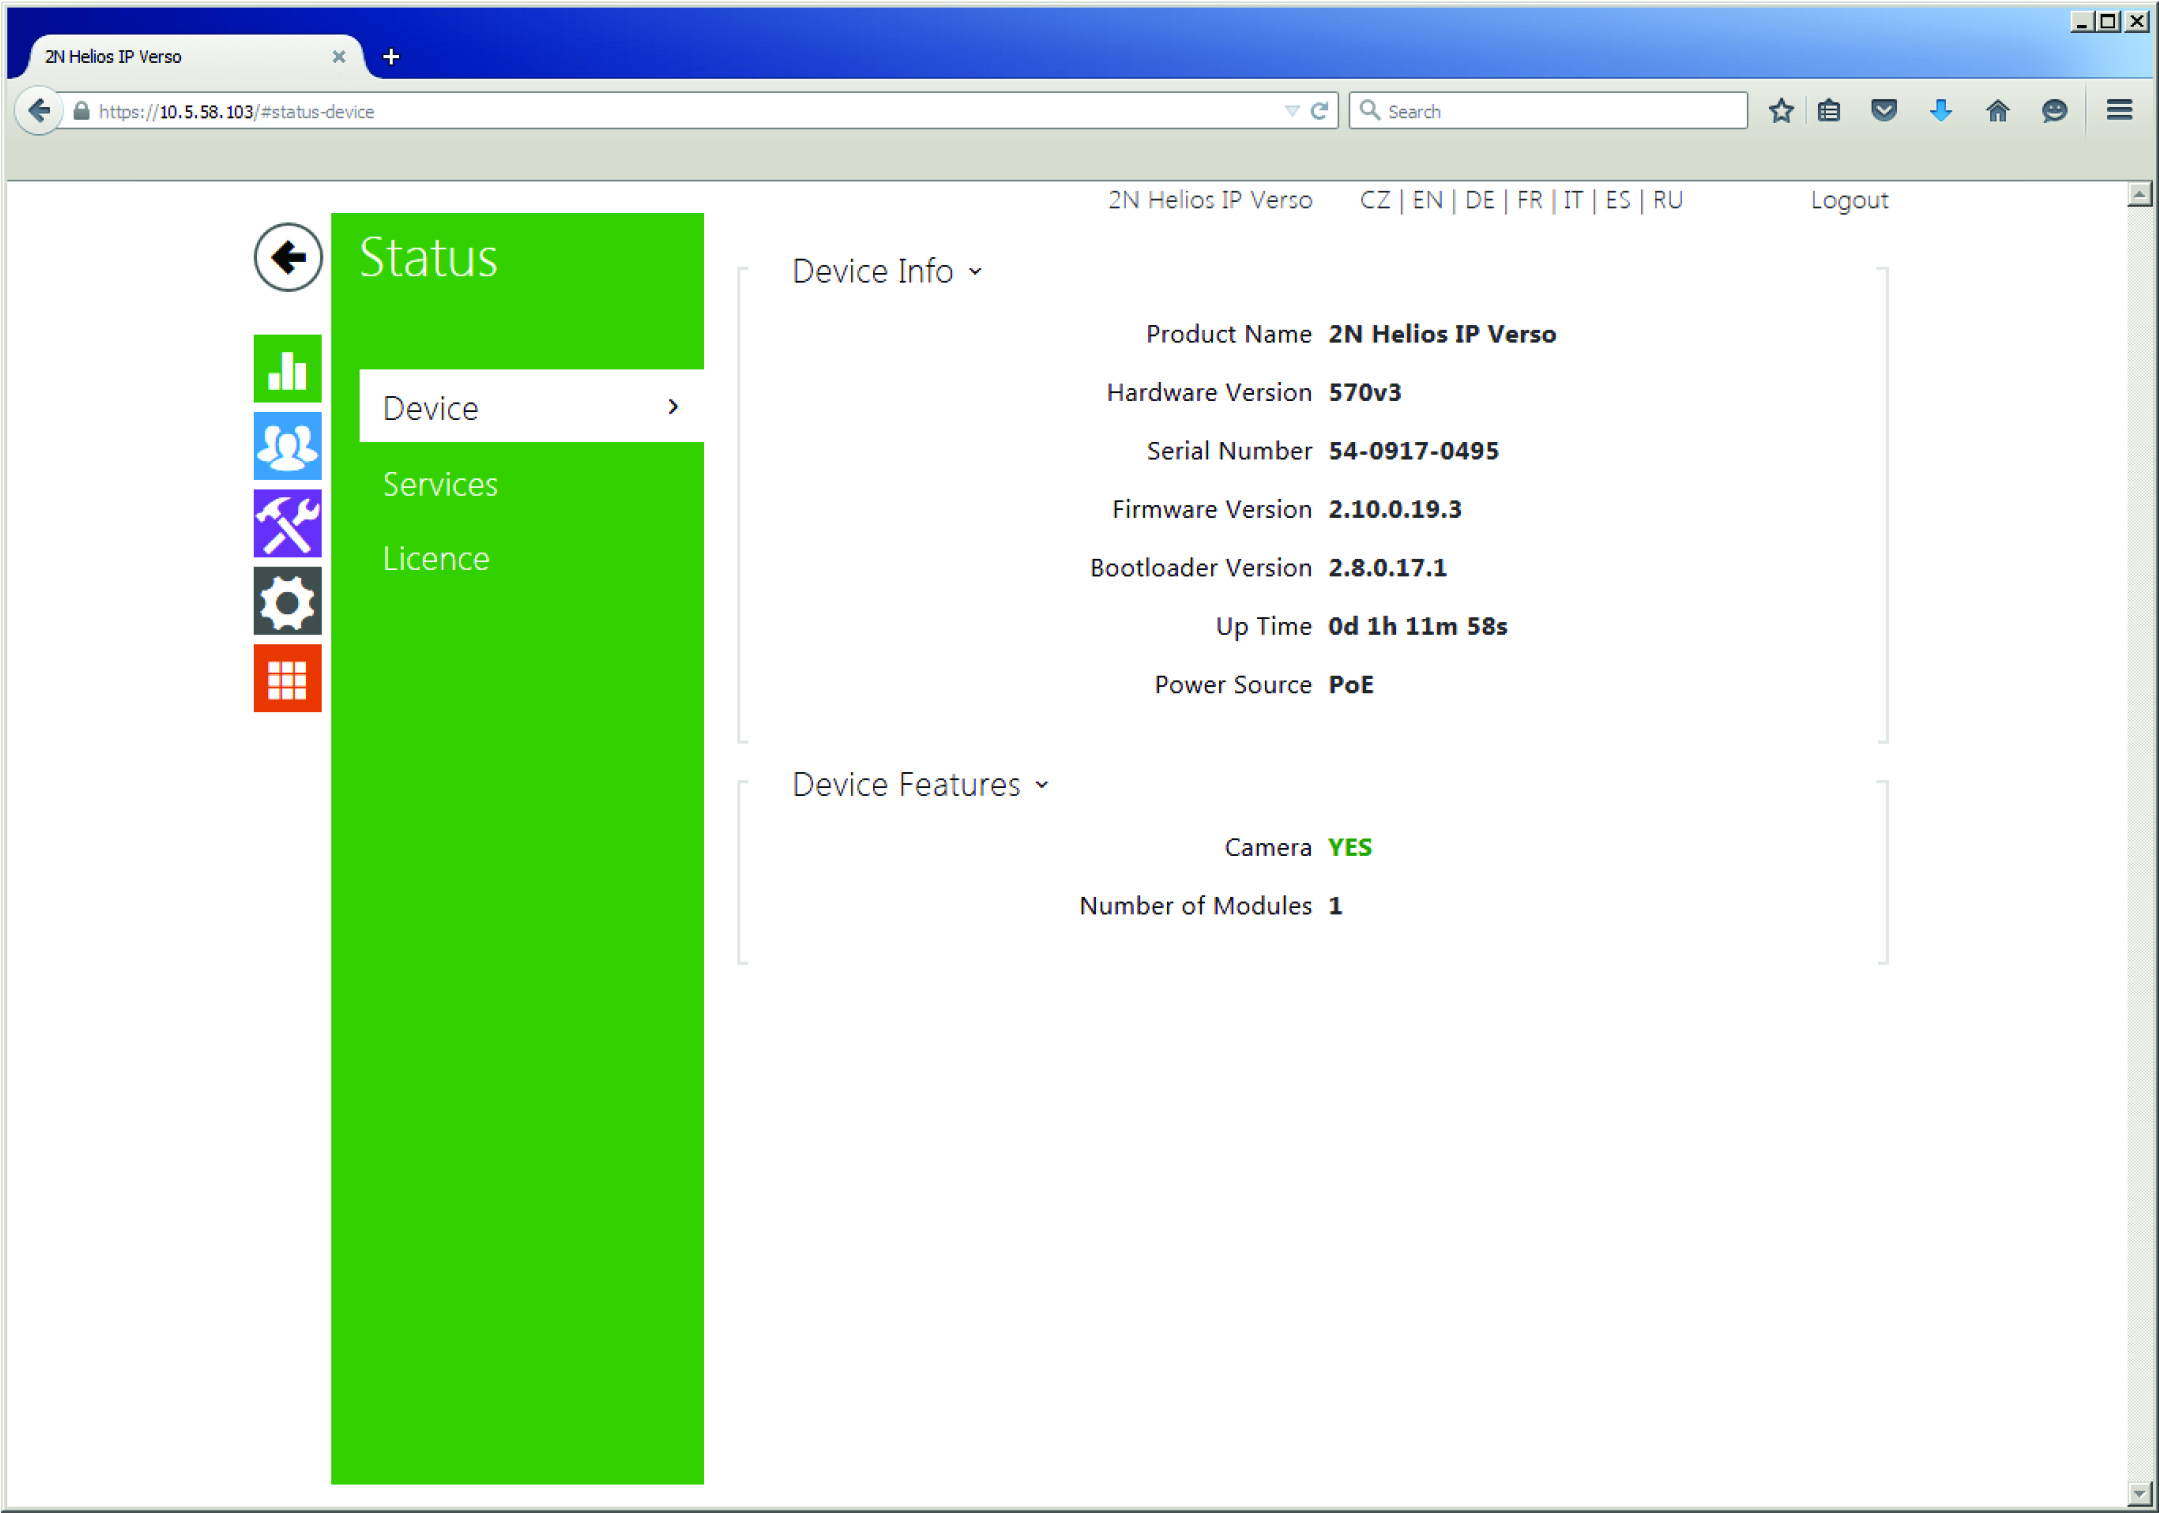
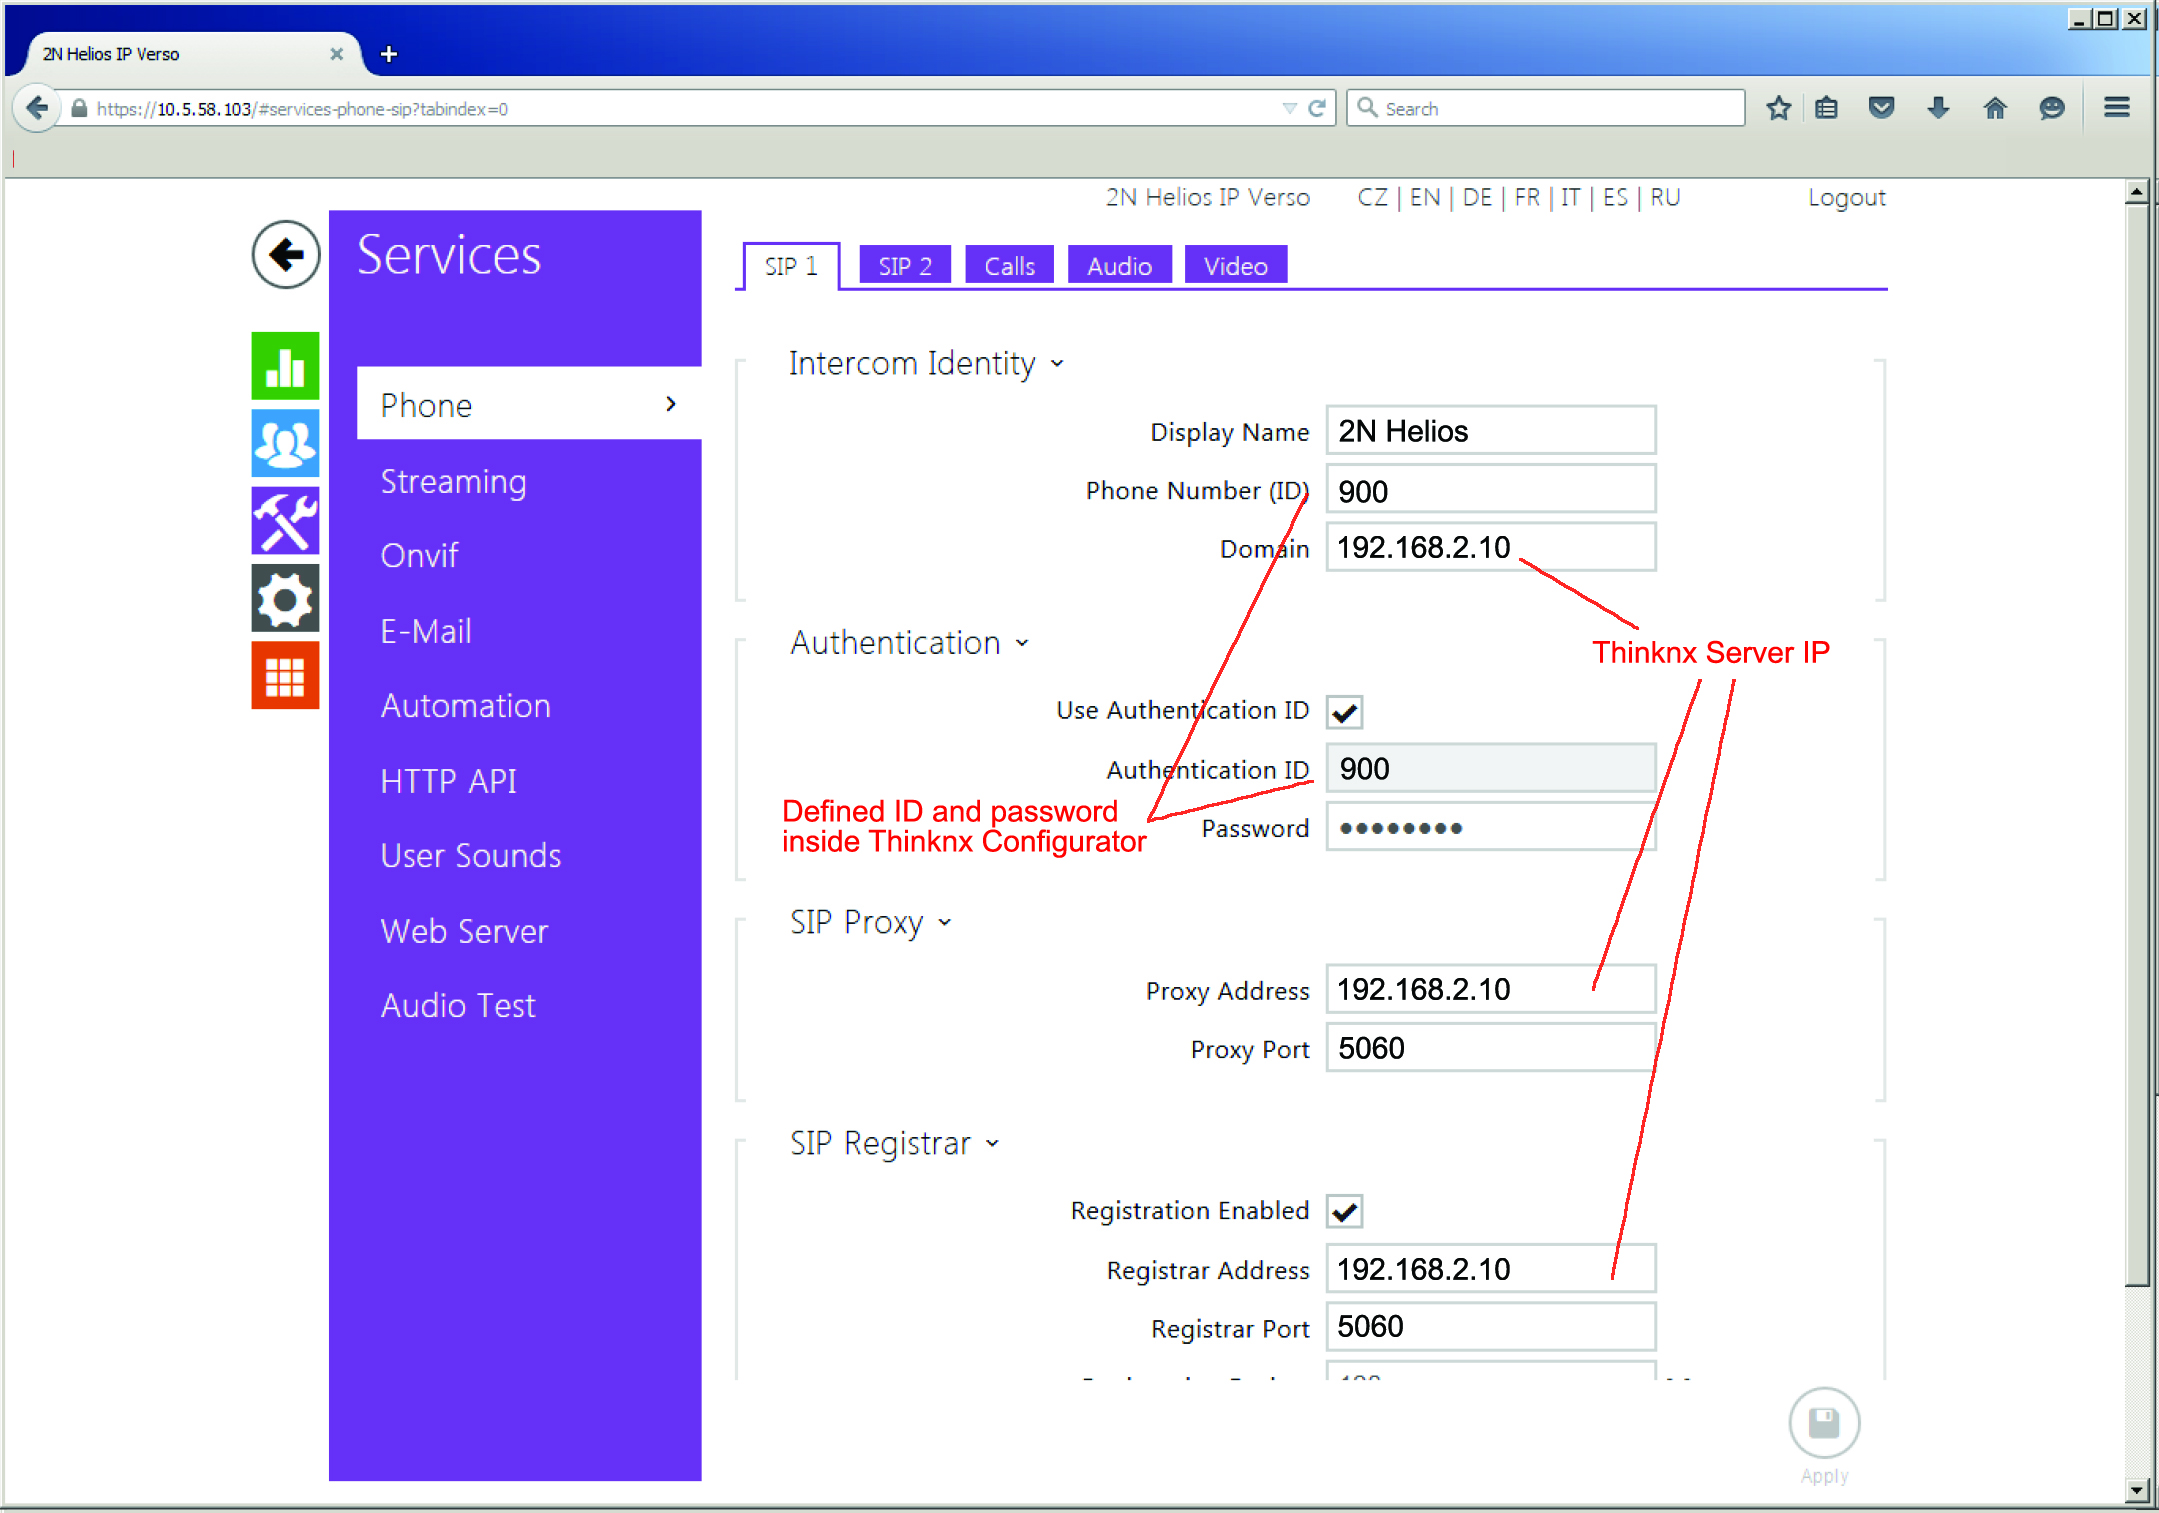
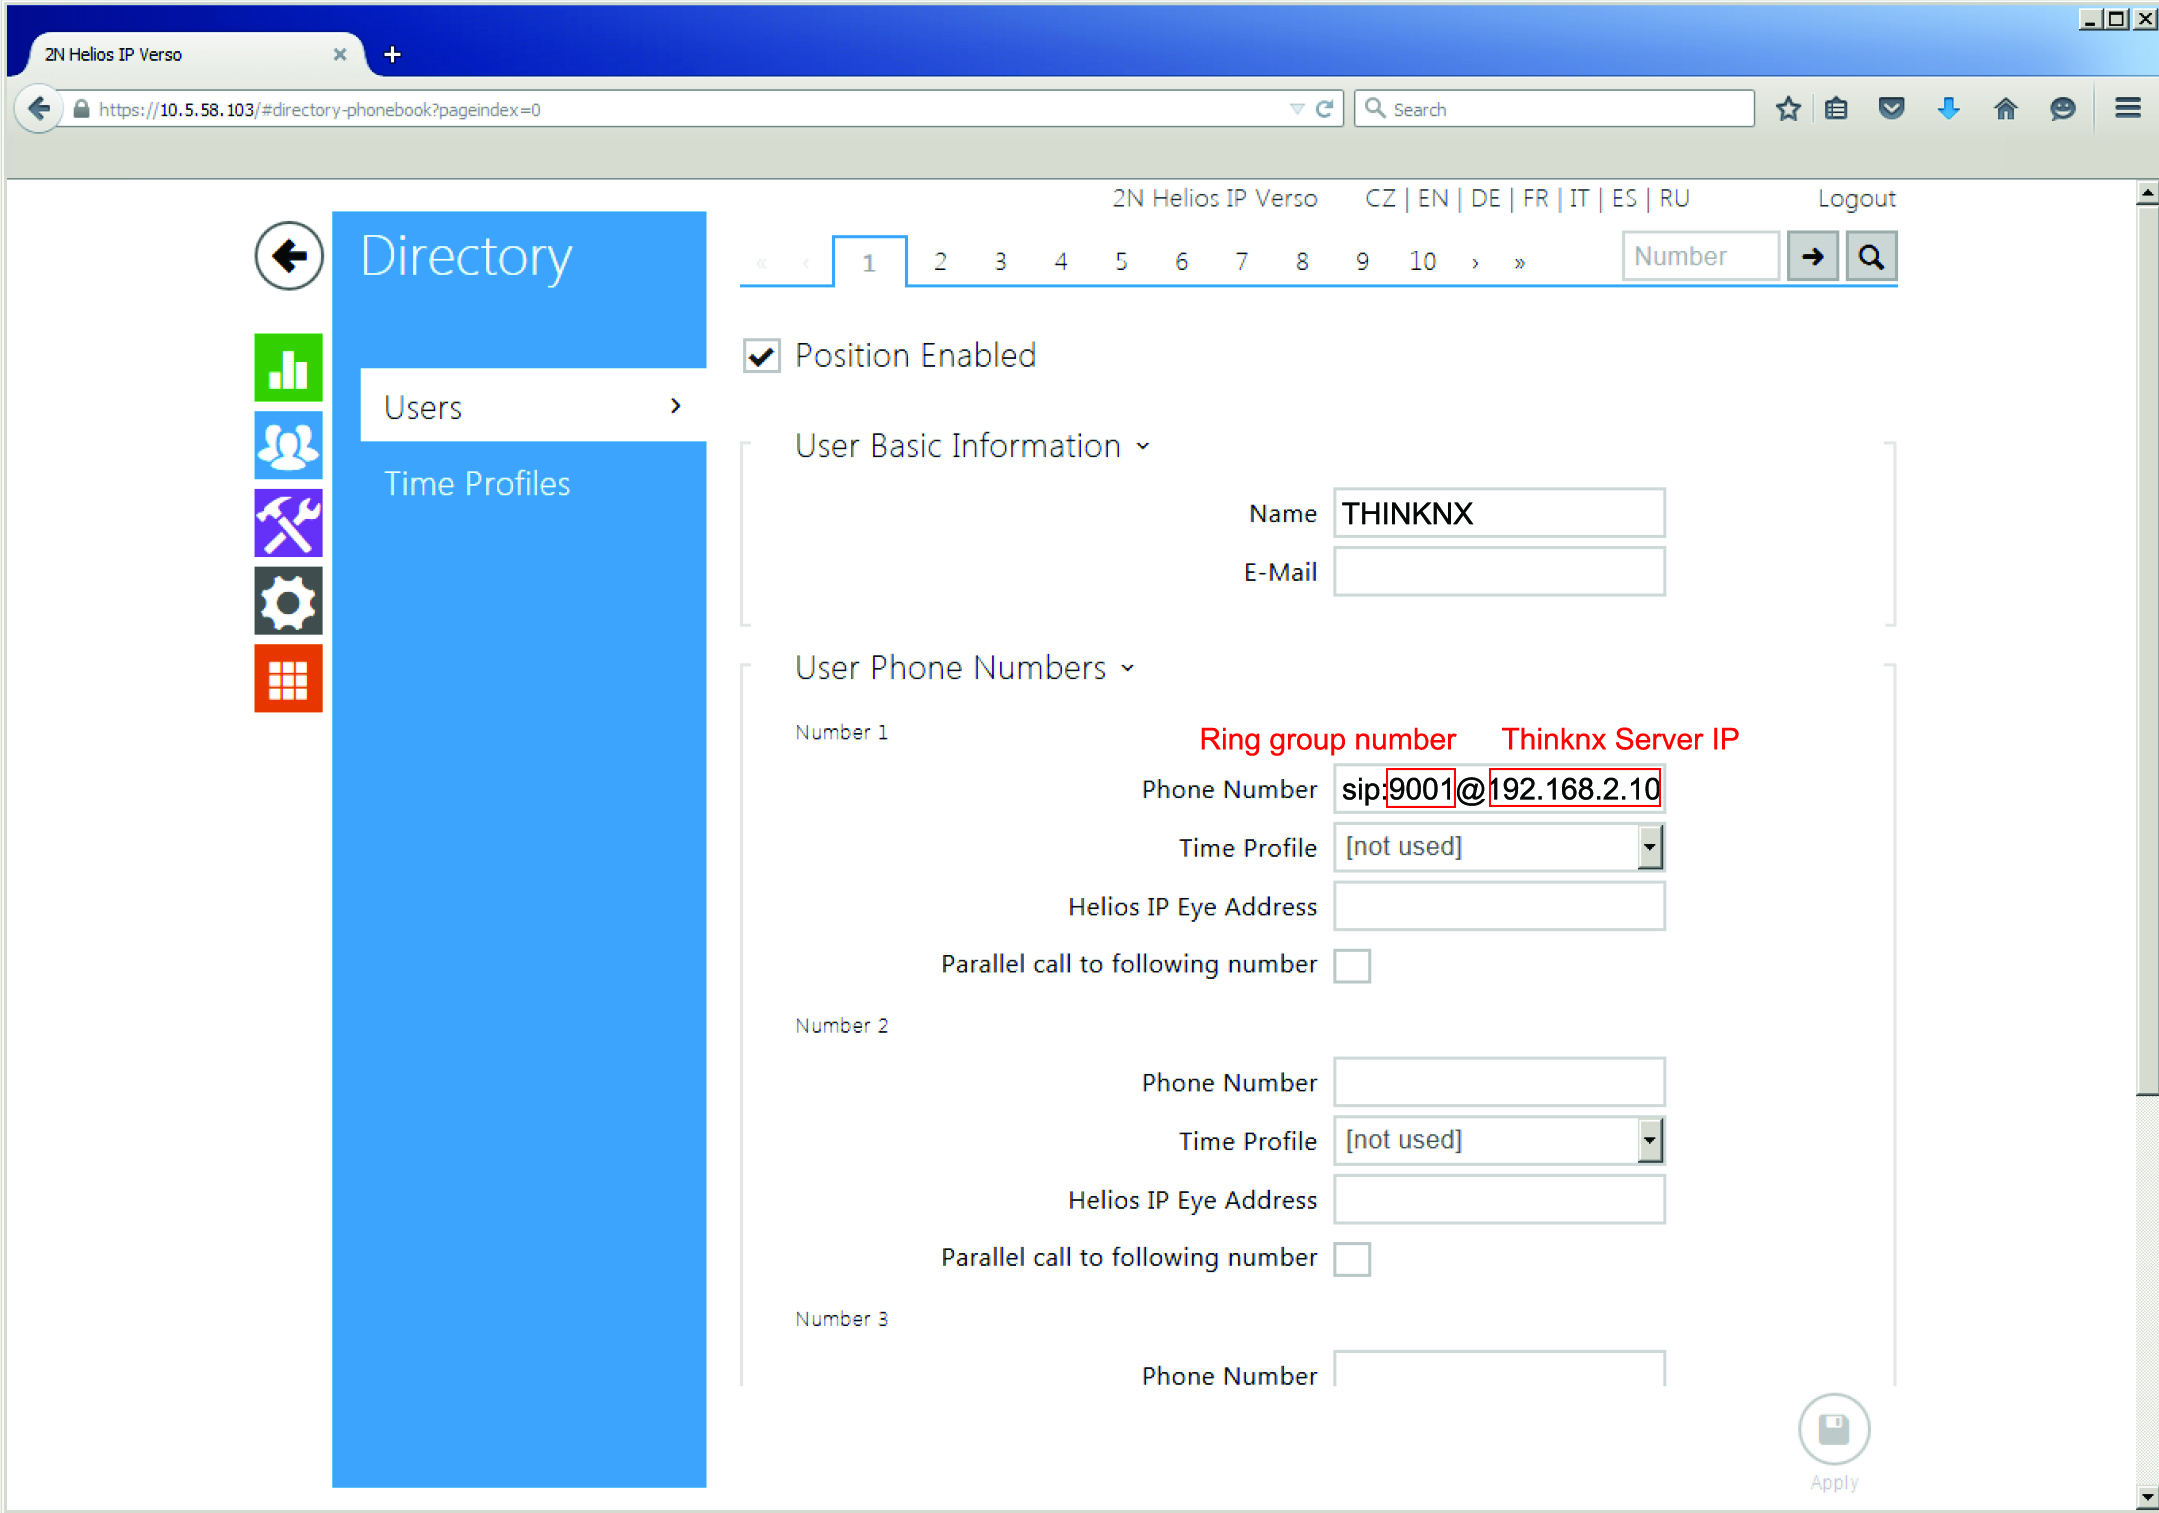
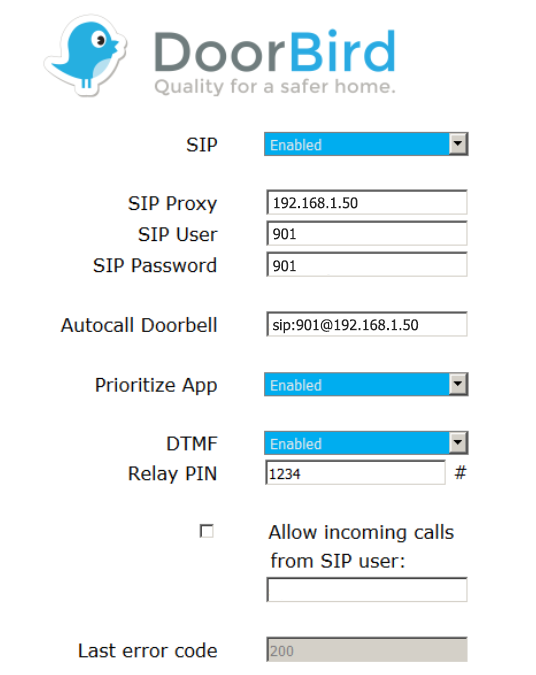
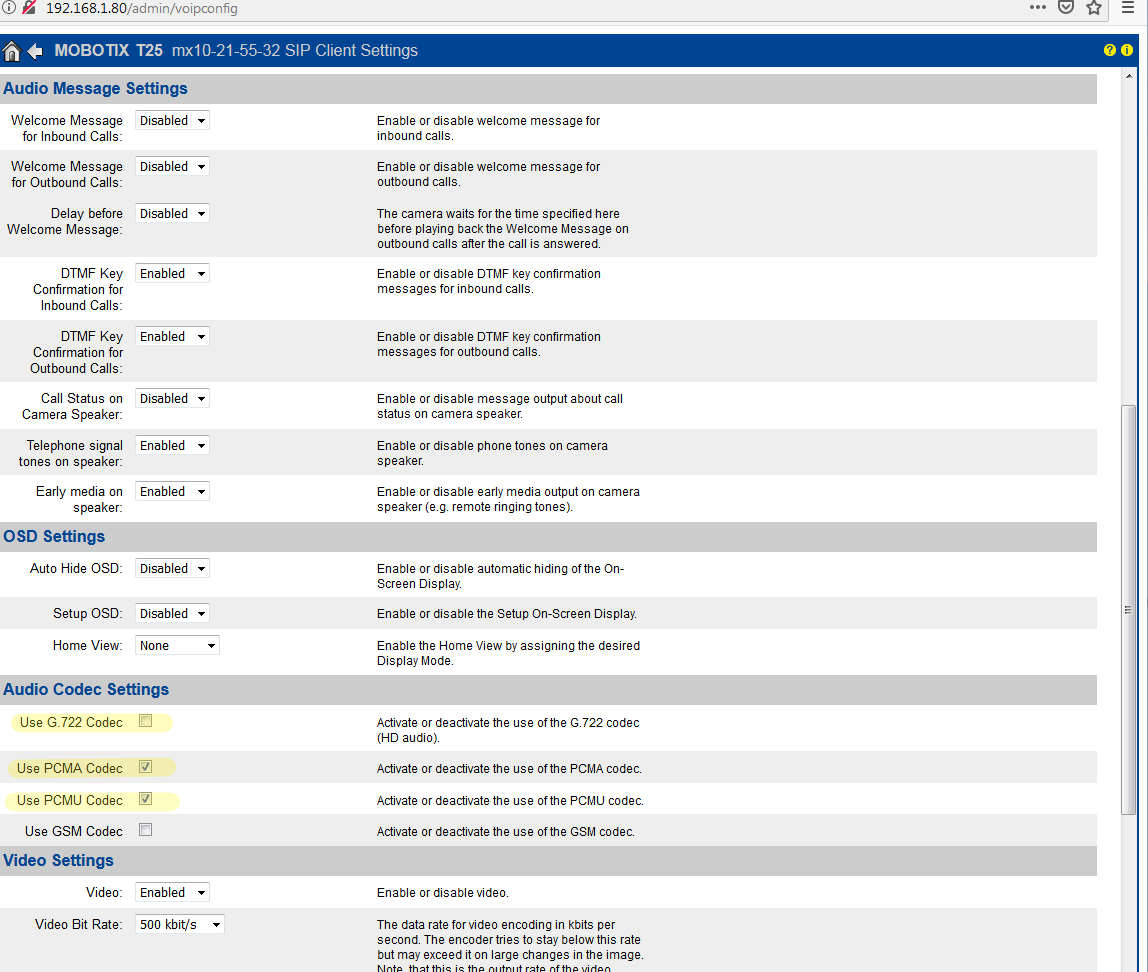
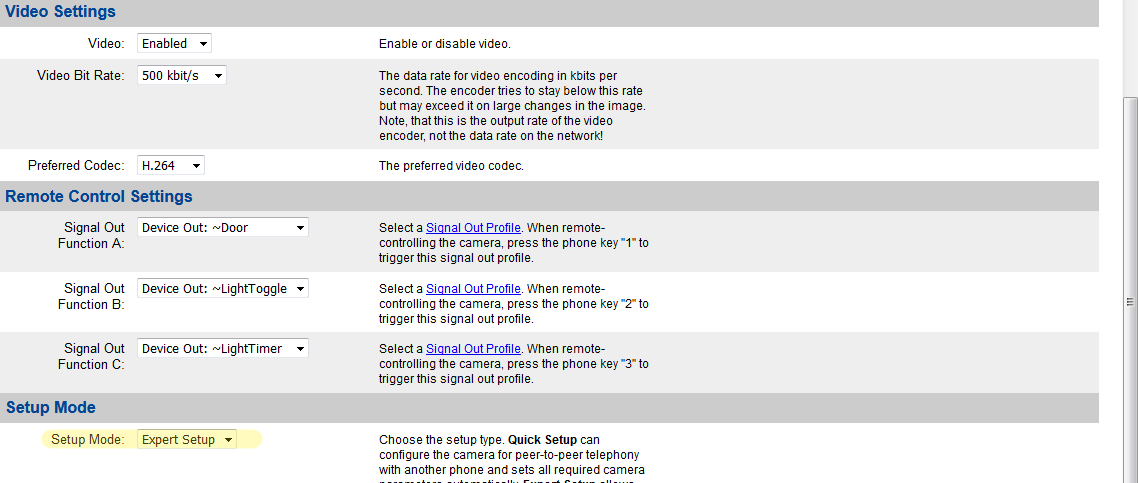
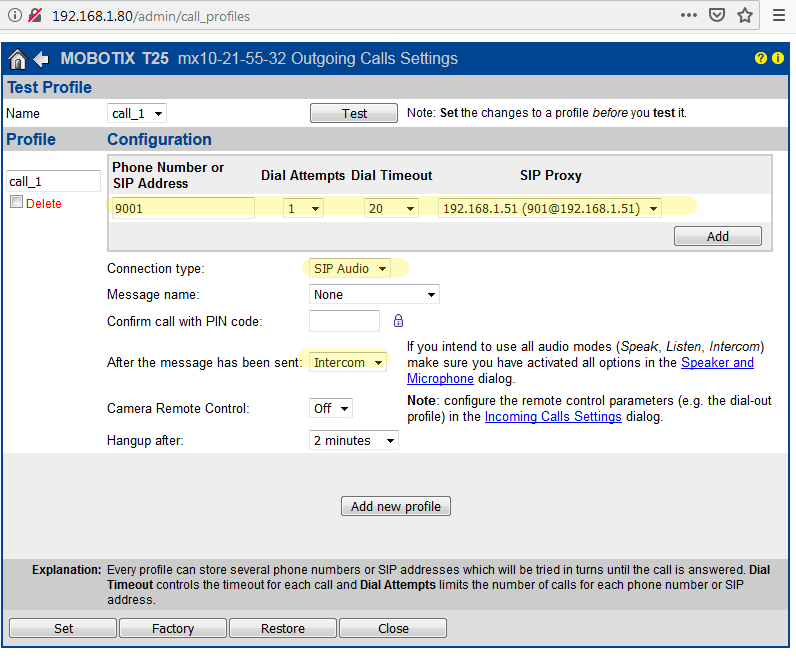
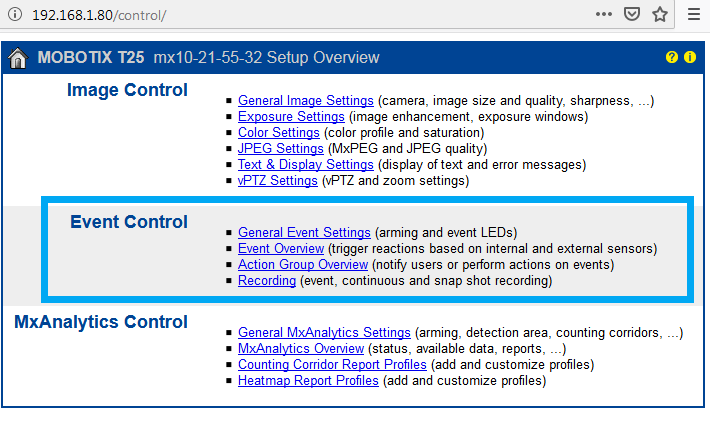
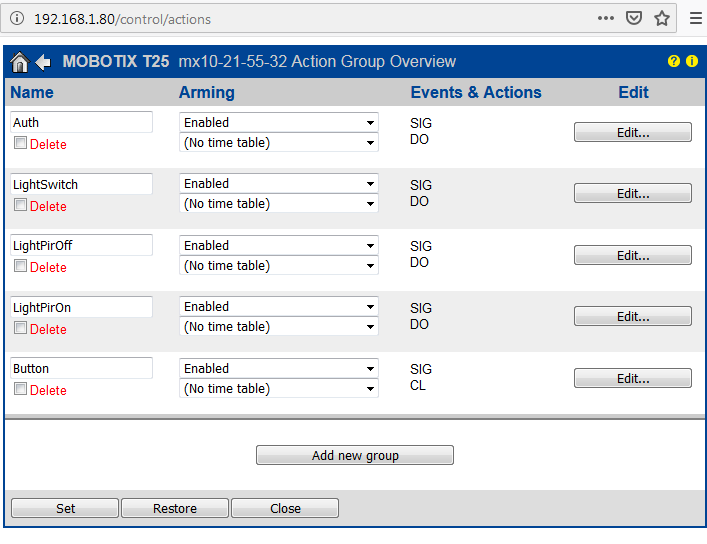
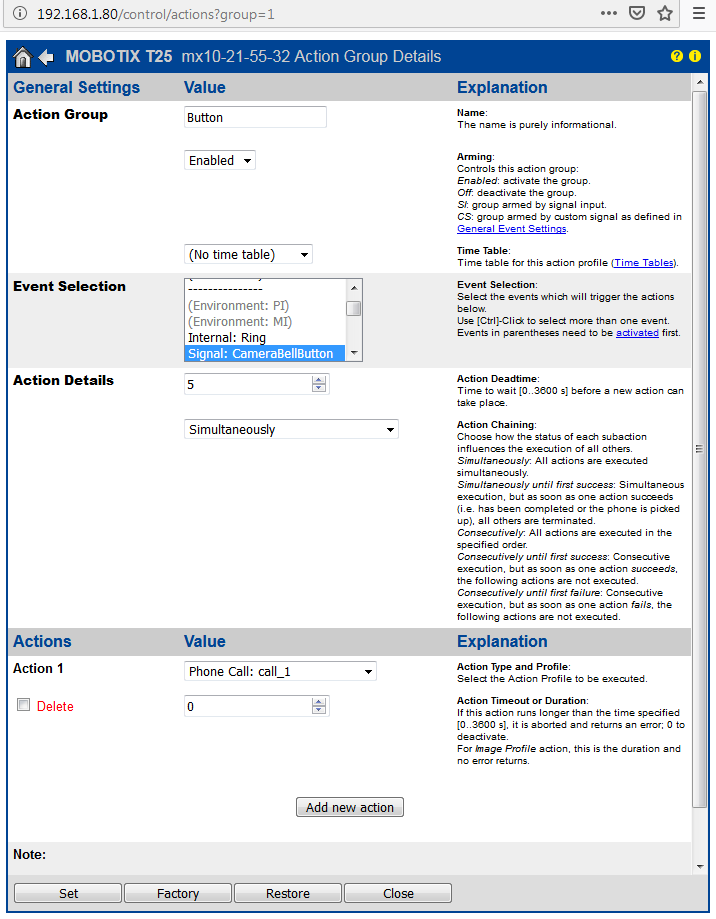
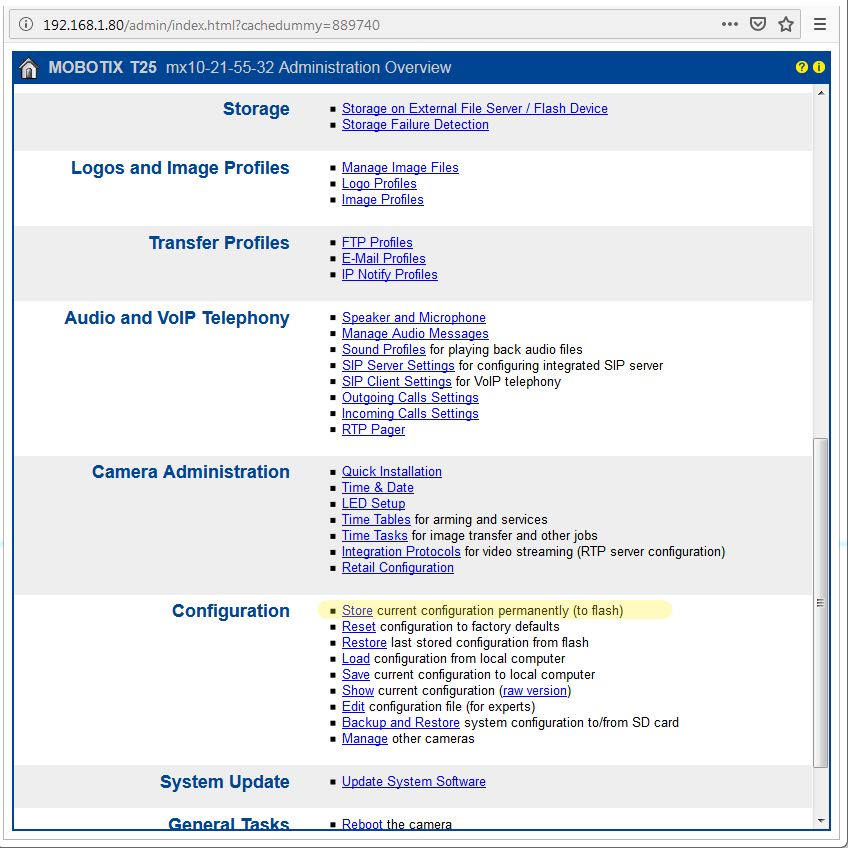
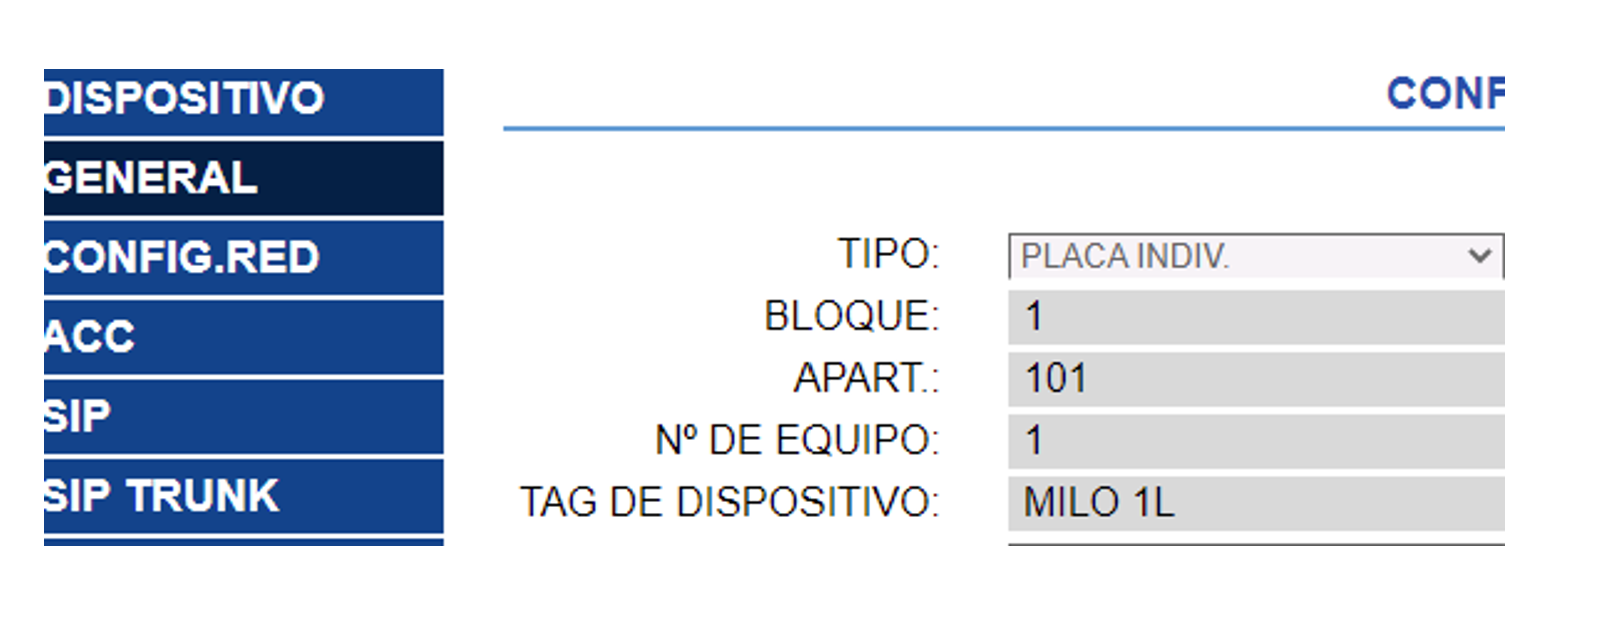
The following examples describe SIP configuration and, where applicable, video and door release control. Property names and locations in third-party devices may vary depending on the firmware version.