Project Deployment
- Project Deployment
- Deploy project using Thinknx Cloud
Project Deployment
When a project is completed it has to be deployed on the server and the various clients.
When the project is modified, even slightly, it is important to transfer it to the server and to the clients. If the project version on the server does not match the version on the client, the application will not work correctly.
There are two ways to deploy a project:
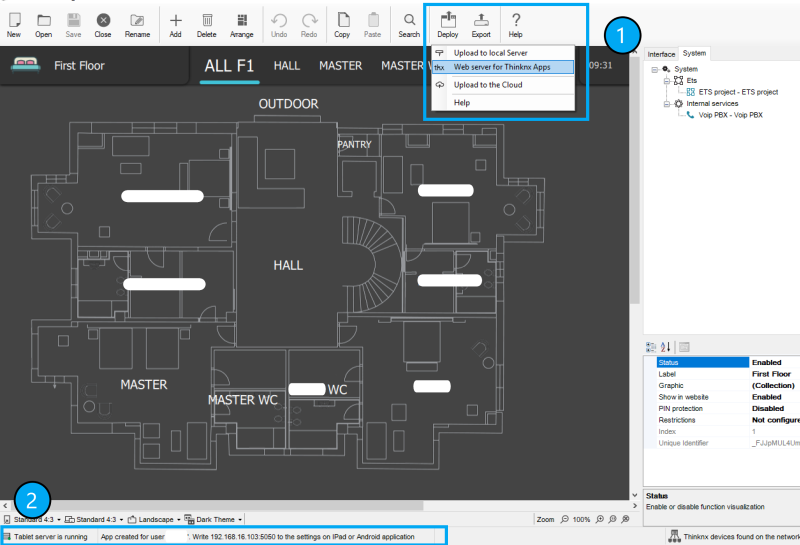
By clicking on the “Deploy” button, the following options will be displayed:
- Upload to local server This option is used when trying to upload the project using the local network. It saves the project onto the server and memory can be allocated for objects that require to be configured by the user. For more information regarding the project deployment via local network, see this section below.
- Web server for Thinknx Apps This option is also used when uploading the project locally, however instead of sending it to the server, it is used to update the clients. Using this option, the Configurator will publish locally a version of the project that can be downloaded from Thinknx Apps. For more information regarding the project deployment via local network, see this section below.
When you export the project for the Apps using this feature, the Configurator will create a snapshot of the project at the time you press the button. If you make modifications to the project and you want to actualize the apps content you need to press again the deploy button so that you will be able to download the new snapshot with all the modifications.
This feature will work only when the PC running the configurator is on the same network of the device running the App. It is useful when internet is not available or during the test phase of the project. When the project is finished it is advisable to use the Cloud feature that will guarantee that all the clients will use the same project version.
- Upload to the Cloud This option is used when the project is being deployed to the devices via Thinknx Cloud. All the clients’ versions of the project (one for each user) are uploaded to the Thinknx Cloud server. If the project doesn’t contain any users, only the main version is uploaded. A popup indicating the progress of the upload will appear. For more information regarding the project deployment via Cloud, see this section below.
Deploy project using the local network
This method should be used when the Thinknx server is connected to a local network but has no access to the Internet. However, it requires the use of a PC with the Thinknx Configurator installed as well as the availability of all the client devices on site. The PC and the clients should be connected to the same network as the Thinknx server.
Step 1: Deploy project to the server
- After saving the project inside the Configurator, click on “Deploy”, and select “Upload to local server”. After the upload is completed, the server will reboot.
Figure 1: Deploying to Local Server
After selecting to deploy project to server, the Configurator automatically checks the system properties to confirm that a valid IP address has been set for the server; otherwise the deploy cannot be finished. If components not corresponding to the selected licences have been configured in the project, the Configurator displays a warning message. The export can still be finished but the commands related to unlicensed objects will not be working.
Step 2: Deploy project to the client
- After deploying the project to the local server, you will automatically be asked if you wish to do the same for the client. If the automatic request does not show, you can click on “Deploy” and select “Web server for Thinknx apps”. In case some users have been created inside the Configurator, select the user corresponding to the client device (see this section for more information). A message at the bottom of the Configurator will show stating that:
“Tablet server is running. App created for user ”[username]“. Write [PC_IP_address]:5050 to the settings on iPad or Android application”.
Figure 2: Deploying to Local Client
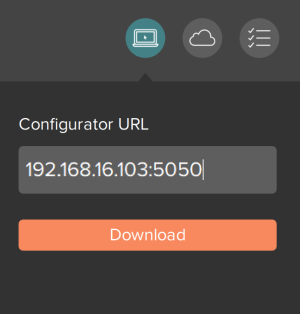
- On the client device, Go to “Settings”, select the tab with a PC icon related to the Configurator, write down in the Configurator URL the IP_address:5050 mentioned in the previous step and click “Download”. The project will be downloaded to the client's device and the progress will show on the Configurator.
Deploy project using Thinknx Cloud
This method is more popular than the previous one because it allows to deploy the project to server and clients remotely. The main condition to achieve this is to have the Thinknx server connected to the Internet.
Step 1: Enable Thinknx Cloud on the server
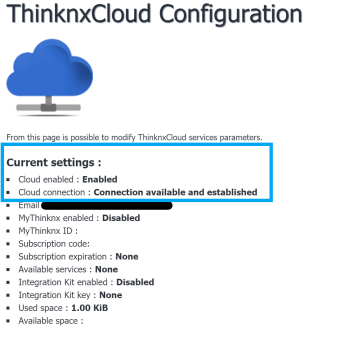
In the web interface of the Thinknx server, click on “Server” tab, select “Thinknx Cloud” from the list, and click on “Enable Thinknx Cloud”. Fill in the new password and email address and click “Enable”. The Cloud service should now be enabled, and the connection should be “available and established” as seen in the picture below.
Step 2: Configure the Cloud inside the Configurator
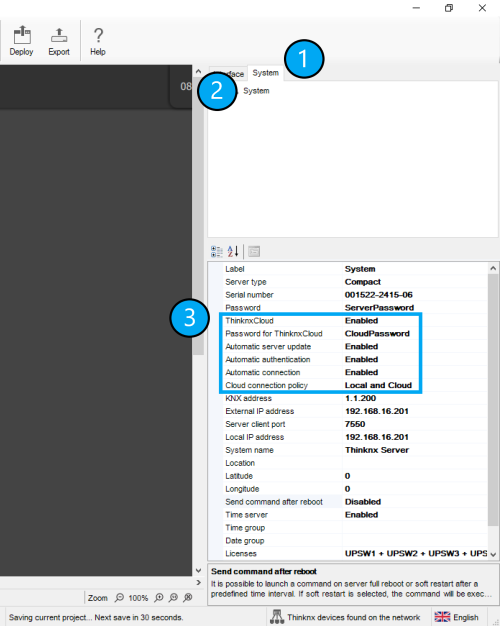
Open project inside Thinknx Configurator and enable Thinknx Cloud in the “System” tab. Make sure to enter the same password used in the web page.
It is also important to enable “Automatic Server update” allowing the server to be updated automatically with every project upload to the Cloud.
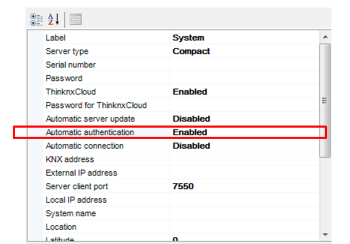
Enabling “Automatic Authentication” will allow new users to access the mobile application without the need for an intervention on site (see section Client Authentication below).
Finally, selecting “Local and Cloud” for the “Cloud Connection Policy”, will allow the client to control the project remotely using Thinknx Cloud whenever the local connection fails.
Figure 7: Configure Cloud inside Configurator
Step 3: Upload the project to the Cloud
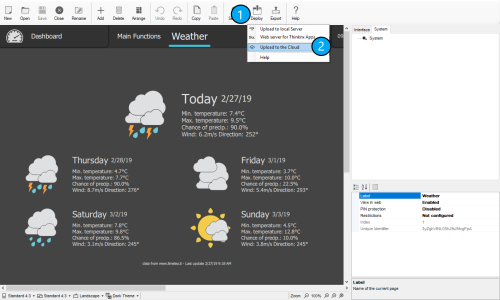
Inside Thinknx Configurator, click on “Deploy” and select “Upload to the Cloud”. Allow 1-2 min after upload for the server to reboot.
Figure 8: Upload to Cloud
Step 4: Download the project onto the client device
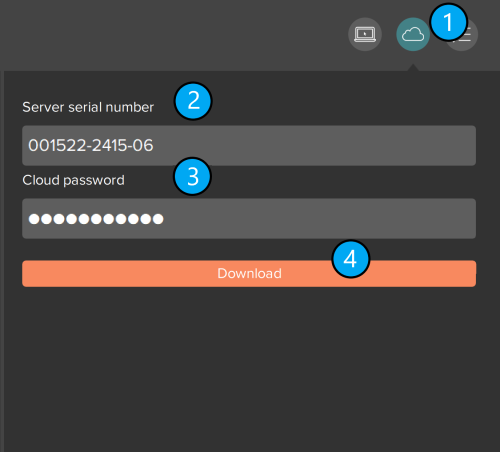
Open Thinknx application and go to Settings. Select the Cloud icon, and enter the serial number of the server and its corresponding password (Cloud password).
If users have been created inside the Configurator, then the password entered should be the corresponding password of each user.
Figure 9: Download project from Cloud
QR Code Download
When the project is uploaded onto the Cloud, the user can also download it on their client device by simply scanning the QR code provided by the integrator. This QR code is generated by the Configurator by accessing the Users and Groups window and clicking on the Data Summary of each user profile. For more information, check out section 2.Thinknx Configurator - Users and Groups.
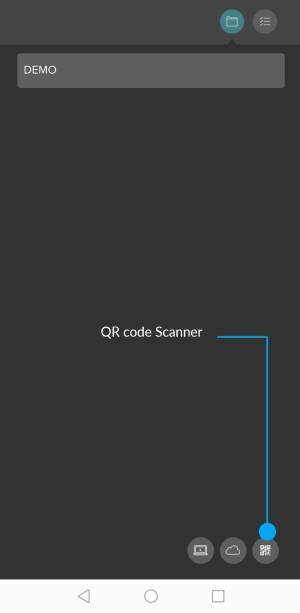
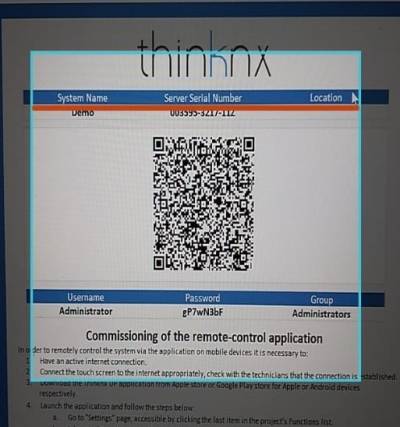
The download can be accomplished by selecting the QR code icon in the Settings window on the client application. The user must allow Thinknx UP application to access the phone's camera. Scan the QR code, and the project download will automatically start. Once finished, open the project and proceed to the Authentication process below.
Figure 10: QR code button on client application
Figure 11: QR code scanning
Client Authentication
Whenever a client uses the Thinknx application, a connection to the server is established. The first time the client opens the loaded project, the server requests an authentication of the device.
Authentication via local network
This method only works if there is direct access to the server's web page.
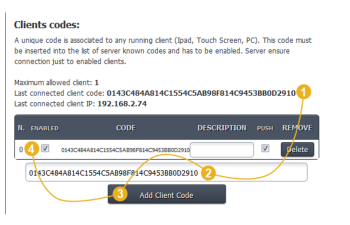
- The Client Authentication is done on the server’s web page, under Server → Licenses & Codes.
- Copy the last connected client code and paste it in the field under the table.
- Click on “Add client code” and check the “Enabled” box.
Authentication via Cloud
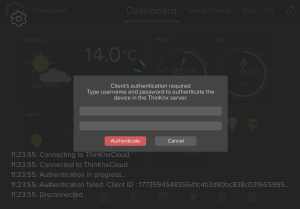
The authentication can be done remotely without the need to access the server's web page. It only requires the creation of the users inside the Configurator project. The username and password of each user shall be used to allow access to the project. Another requirement is to have «Thinknx Cloud» enabled, as well as «Automatic Authentication» inside Configurator.
Authentication via OTP
This feature is available for server firmware 1.1.10.22 and above, configurator version 1.3.0.24 and above, and UP client version 1.2.24 and above.
Instead of sharing a username and password to allow users to authenticate with the server, it is possible to generate a one-time password (OTP) and send it to the client. The code generated is valid for 2 hours, after which it will no longer work.
Generating the OTP
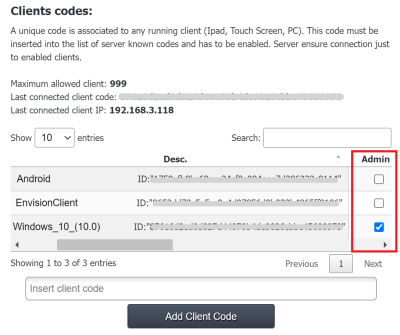
- Only an Admin user can generate an OTP. The code is generated directly from the client application. To define an authenticated user as Admin, go to the server's webpage under Licenses and Codes, and make sure to enabled the Admin option for the admin user.
Figure 16: Admin Configuration
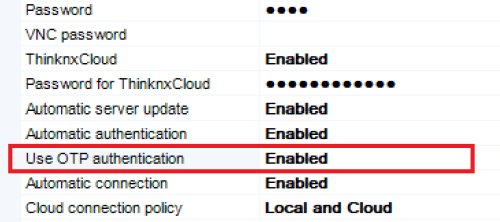
- In the configurator, click on System and enable “Use OTP Authentication”.
Figure 17: Enable OTP Authentication
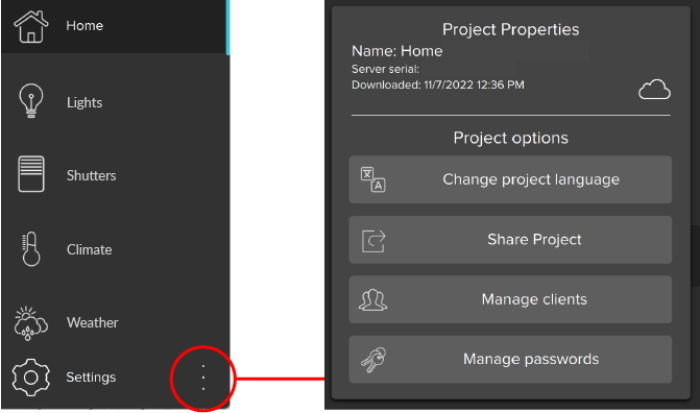
- Open the project using the Admin profile, and access the advanced settings window as seen in the picture below.
Figure 18: Project Settings
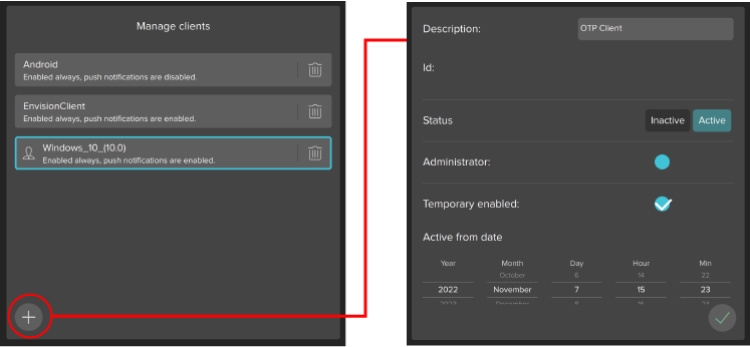
- Click on Manage Clients, and add a new user. Configure your preferences for this user and save it.
Figure 19: Create User
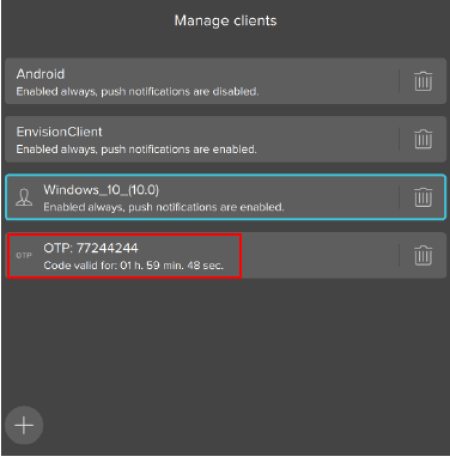
- The user created is now visible in the Users list with the OTP displayed as the user label. The admin can now share this OTP with another user to authenticate with the server.
Figure 20: OTP created
Using the OTP to authenticate
- Any user wanting to authenticate with the server should ask the Admin for the OTP.
- Download the project on the user's device using one of the methods explained above.
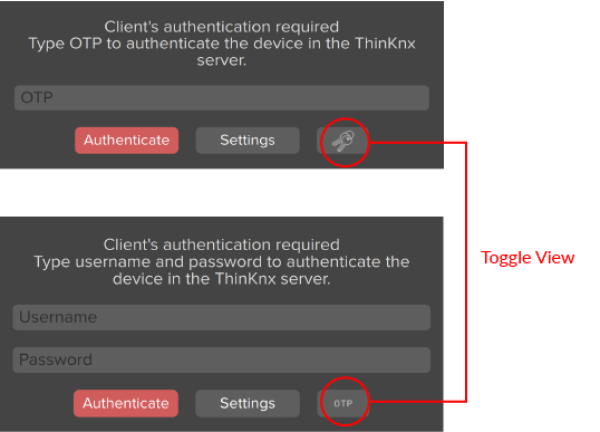
- Open the project downloaded. A popup shows up, asking the user to authenticate. A toggle button on the extreme right of the popup gives the option to authenticate using username and password, or OTP. Select the OTP view mode, and enter the OTP generated by the Admin.
Figure 21: OTP Authentication
Project Export
Even if the projects are saved inside the Configurator, it is always recommended to export the files and save them for backup in case of a computer failure. It is also useful to transfer files from one Configurator to another.
To export projects, click on “Export” button in the upper bar inside the Configurator. The following options are displayed:
- Export project Export procedure allows to save the project created with the Configurator as “.erg” file for the Classic Configurator or “.tup” file for Thinknx UP.
- Optimize project Whenever an image or any kind of file is imported in the Configurator, it is automatically copied to a dedicated folder so that the software does not operate on the original item, risking to affect the project if it is moved or deleted. Doing so, several unused files roll by the project folder; by clicking on this button they will be automatically removed, remarkably improving and simplifying clients performances.
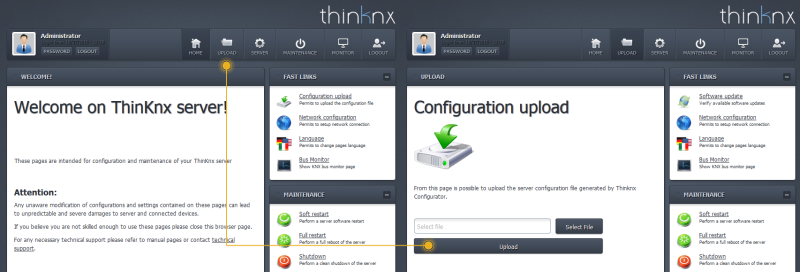
- Export for server on file If the PC which the Configurator is running on is not in the same LAN as the one for the server, the software automatically creates an “.srv” file that can be manually uploaded to the web page. To do so, go to the server's web page, click on “Upload” tab then click on the button “select file”. One the file is selected, click on “upload”. The server will restart automatically and the project is now uploaded.
Figure 22: Export for server on file
- proj_deploy.txt
- Last modified: 2023/04/11 12:55
- by ingrid

