Voice Control Gateway
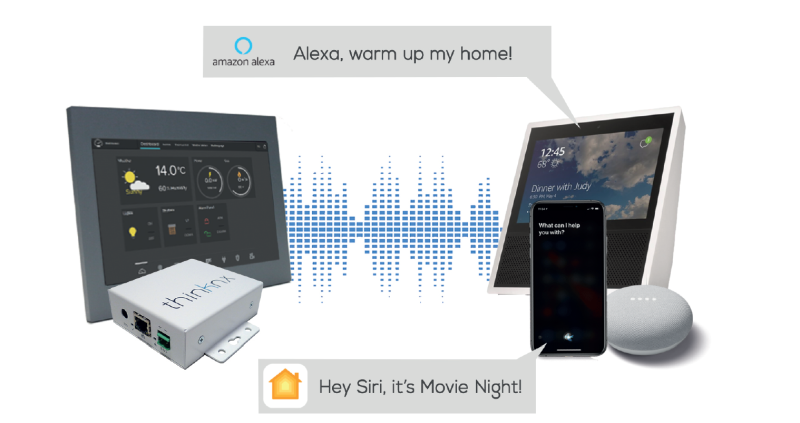
Figure 1: Voice Control with Thinknx
This object allows you to control the house by sending voice commands to your voice enabled device. Integration can be done via:
- Amazon Alexa - New!
- Google Assistant - Coming soon
Inside the Configurator
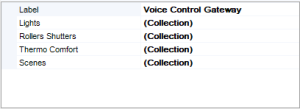
The below parameters are available after adding a Voice Control Gateway object in System:
- Label Text label to identify the object
- Lights Holds the collection of Light objects added
- Rollers Shutters Holds the collection of Shutter objects added
- Thermo Comfort Holds the collection of Thermo Comfort objects added
- Scenes Holds the collection of Scene objects added
Figure 1: Voice Control Parameters
The total number of accessories allowed per hub/server is 149 devices. For a larger number, it is necessary to install an additional server.
Note that it is only possible to control objects that have been added to the Thinknx user interface.
Accessing one of the collections above will lead to a new popup window.
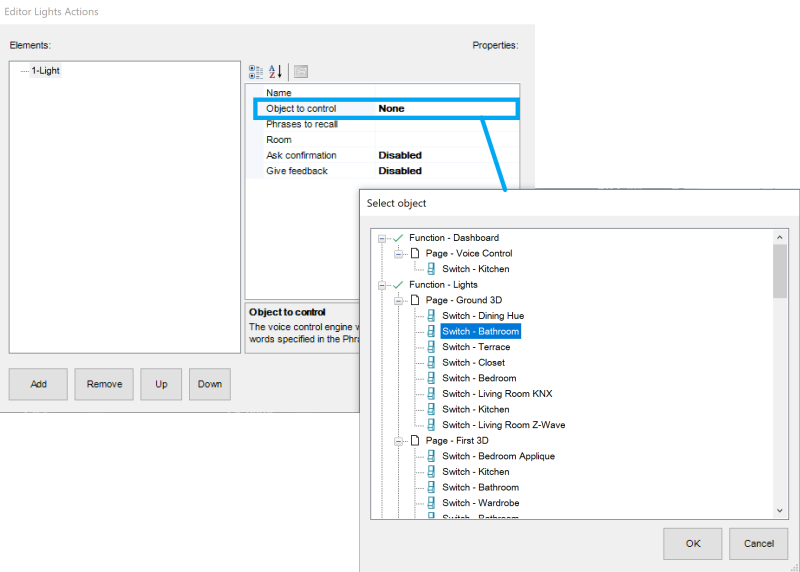
After clicking on “Add”, the below parameters are available for each element:
- Label Text label to identify the object
- Object to control Browse the project to select the interface object to be controlled
- Phrase to recall Phrase to be added to the voice control engine's recognized command list
When naming the elements, make sure not to use special characters for the label or the phrase to recall.
- Room Room where the element is located. It is used by the systems to group devices together
Figure 2: Voice Control Lights
Quick Add
In Thinknx UP Configurator v. 1.4.0.1, a new feature has been introduced that allows for the quick addition of objects to the voice control (Voice Control Gateway), simplifying the integrator’s workflow. When right-clicking on a supported object (e.g. Light, Thermostat, Roller Shutter, Scenario), the context menu now shows the new entry:
Voice control → Voice Control Gateway → [Add / Remove]
The list of Voice Control Gateways configured in the project will be displayed. If there is only one (as shown in the image: Voice Control Gateway), it will appear directly.
- If the object has not yet been added, the available option will be `Add`.
- If it is already added, you can select `Remove` to exclude it from voice control.
The object is automatically inserted into the list of voice commands associated with the selected gateway, without needing to manually access the voice control section of the project.
Object Commands
After adding a Voice Control Gateway to the System, it is possible to send the below command from other objects:
Integration with Homekit
- Step 1 Configure the Voice Control object in Configurator as described in the section Inside the configurator above and upload the Thinknx project to server.
- Step 2 Sign in to the server's web page and go to “Server” –> “Voice Control”.
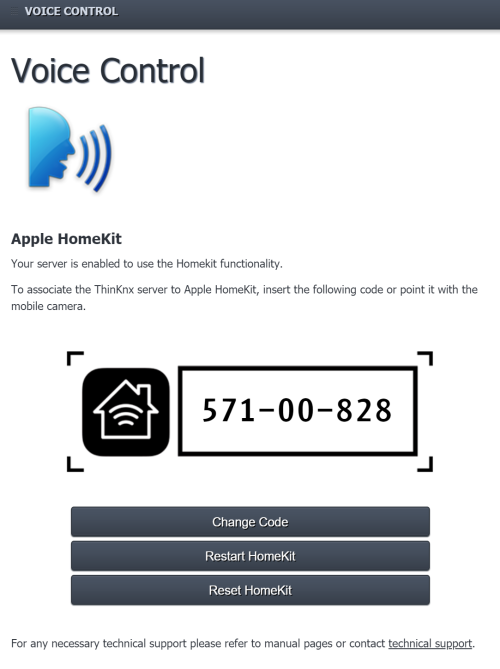
- Step 3 Make sure that your server is enabled to use the Homekit functionality and that you can see an 8-digit code to be scanned.
Figure 3: Voice Control on server
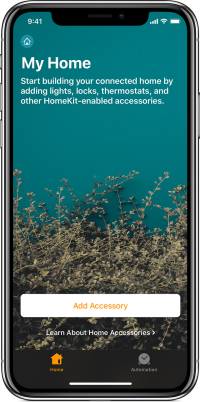
- Step 3 Go to your iOS device and open the Home application.
- Step 4 Click on “Add accessory”.
Figure 4: Homekit Application
- Step 5 Use the camera on your iOS device to scan the eight-digit HomeKit code.
When scanning the code for the Homekit, make sure that your iOS device is not too far away from the Thinknx server.
- Step 6 When your accessory appears, tap it. If asked to Add Accessory to Network, tap Allow.
- Step 7 Name your accessory to help you control it with Siri.
- Step 8 Test your configuration by sending a command to Siri such as “Hey Siri, turn on the kitchen”.
For more information on activating Homekit on your iOS device, check out this guide on Apple's website.
You can also check out the Thinknx Tutorial video for Integration with Homekit on Youtube.
Integration with Amazon Alexa
- Step 1 Configure the Voice Control object in Configurator as described in the section Inside the configurator above and upload the Thinknx project to server.
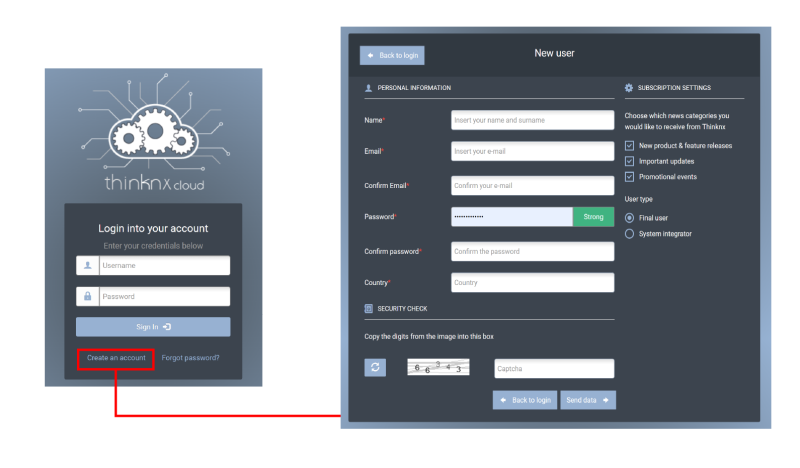
- Step 2 Go to https://data.thinknx.eu/portal and create an account for the end-user on Thinknx Portal (it is recommended to use the email address of the end-user).
New Portal Account
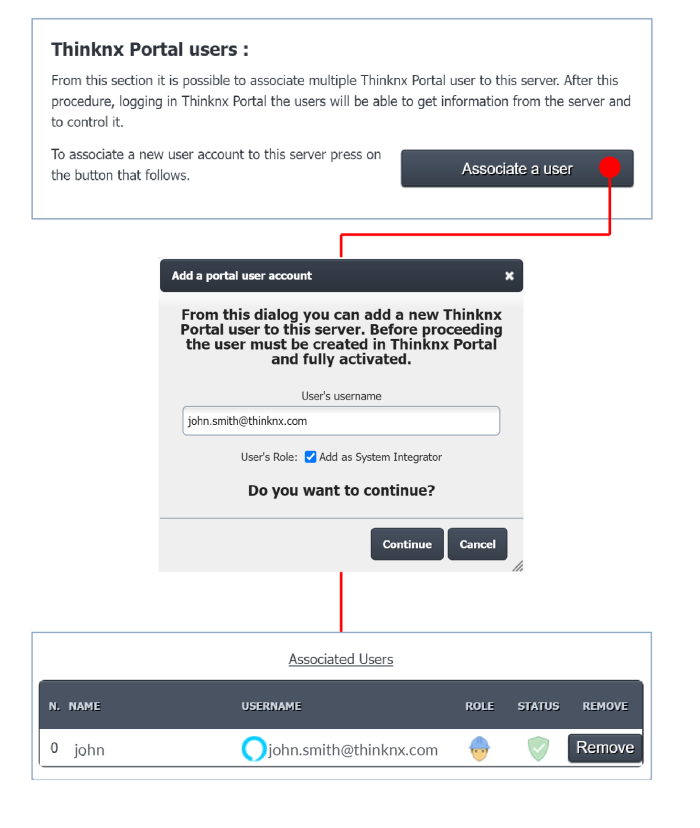
- Step 3 Open the server's webpage to the Thinknx Cloud section and add the user created on the Portal to the server.
Link Portal User
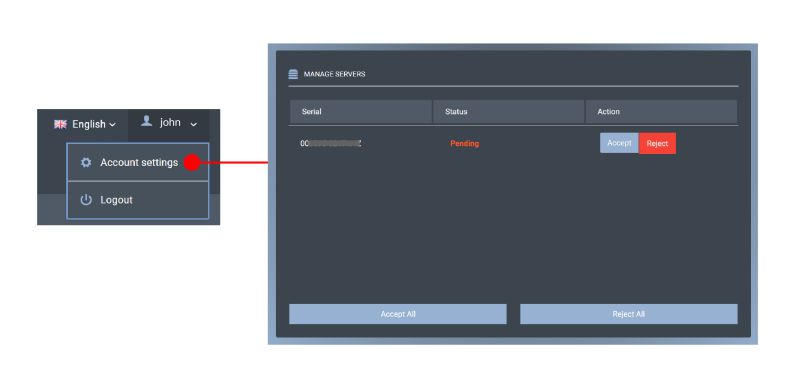
- Step 4 Access the Account Settings in Portal, and authorize the server connection.
Accept Server
- Step 5 Download Amazon Alexa app on the client's phone and sign in.
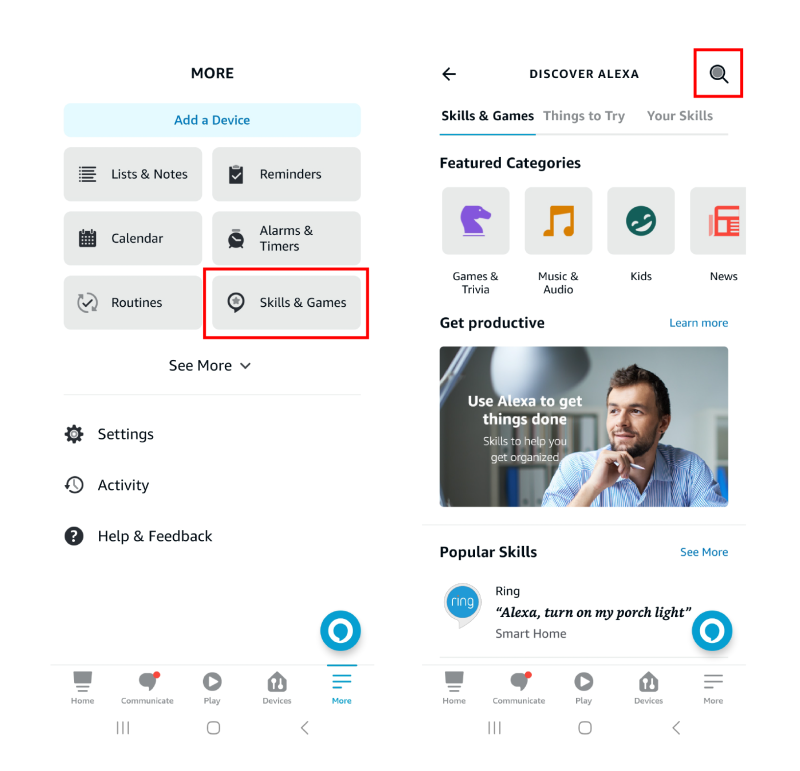
- Step 6 Go to Skills and Games in the Amazon Alexa application, and click on the Search button.
Alexa Skills and Games
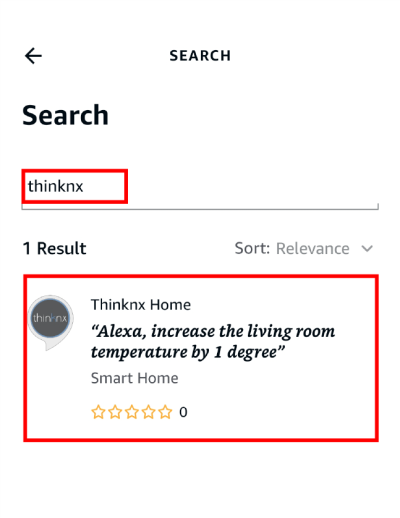
- Step 7 Type the word “Thinknx”, and click on the Thinknx Home result shown.
Thinknx Search
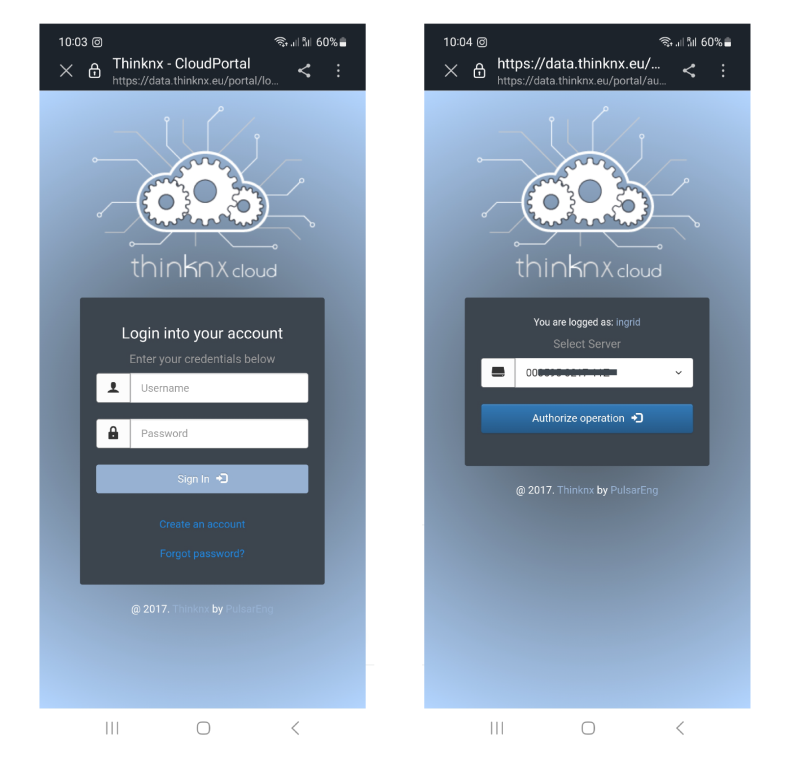
- Step 8 Sign in to the Portal using the account created, and select the server previously connected from the list.
Activate Thinknx Home
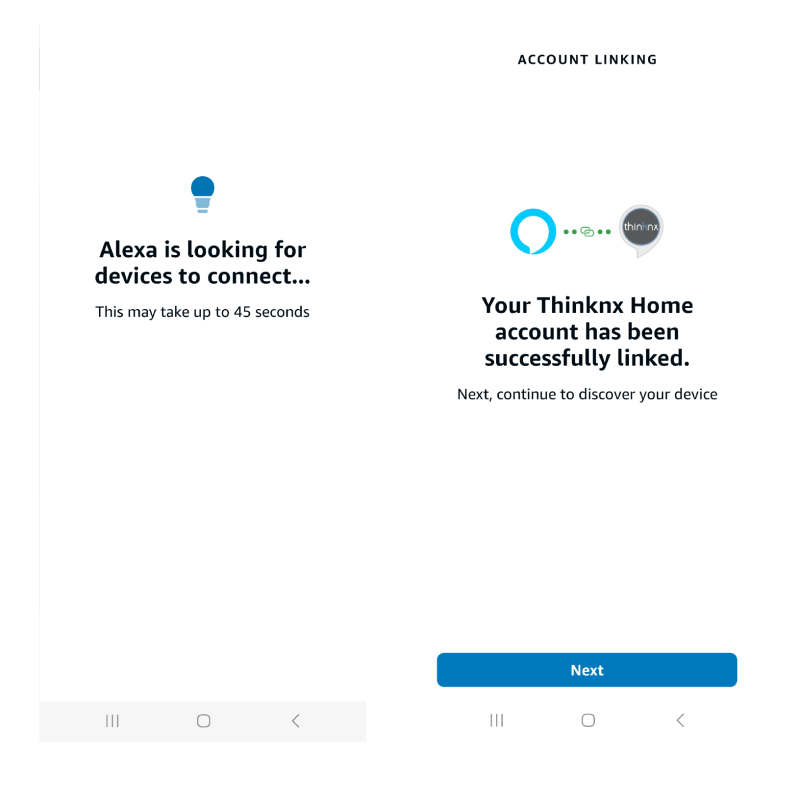
- Step 9 When the skill has finished connecting with the thinknx cloud account click on “Next” and it will start the search for devices (lights, rolling shutters, thermostats, scenarios). At the end of the search the system will be ready to be used.
Thinknx Home Connected
After each restart of the server, the voice control module takes a few minutes for the complete loading. If the voice commands do not work after restart, or some delays are noticeable in the command execution, please wait a few minutes and allow the software to complete the upload cycle.
